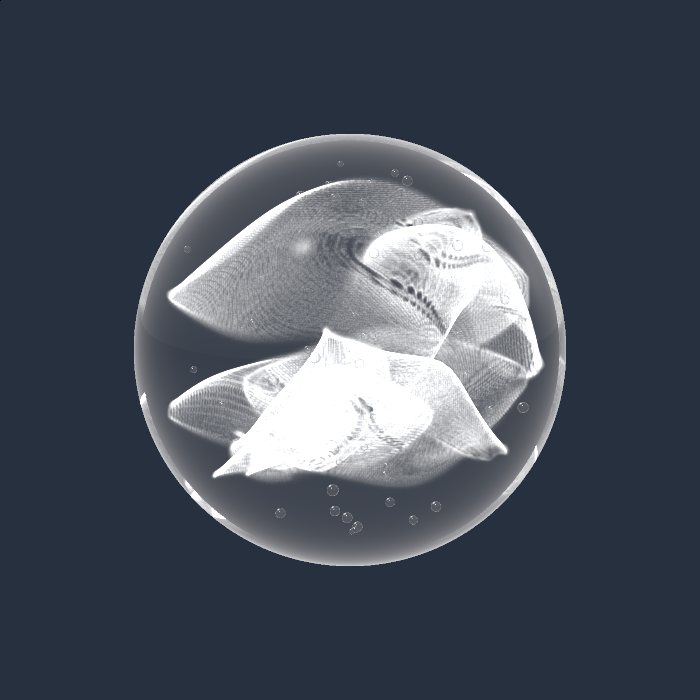
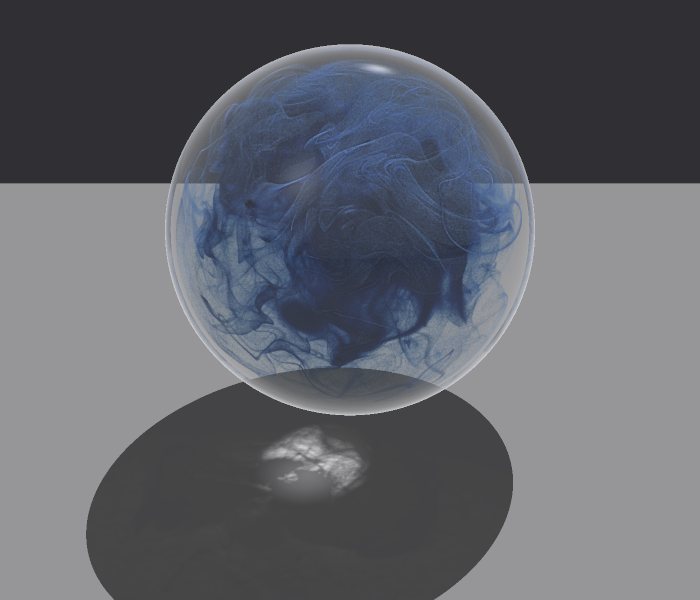
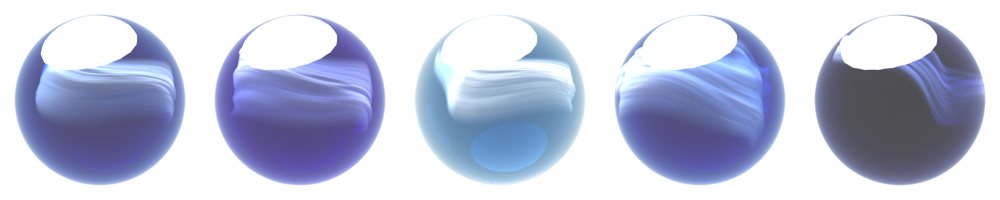
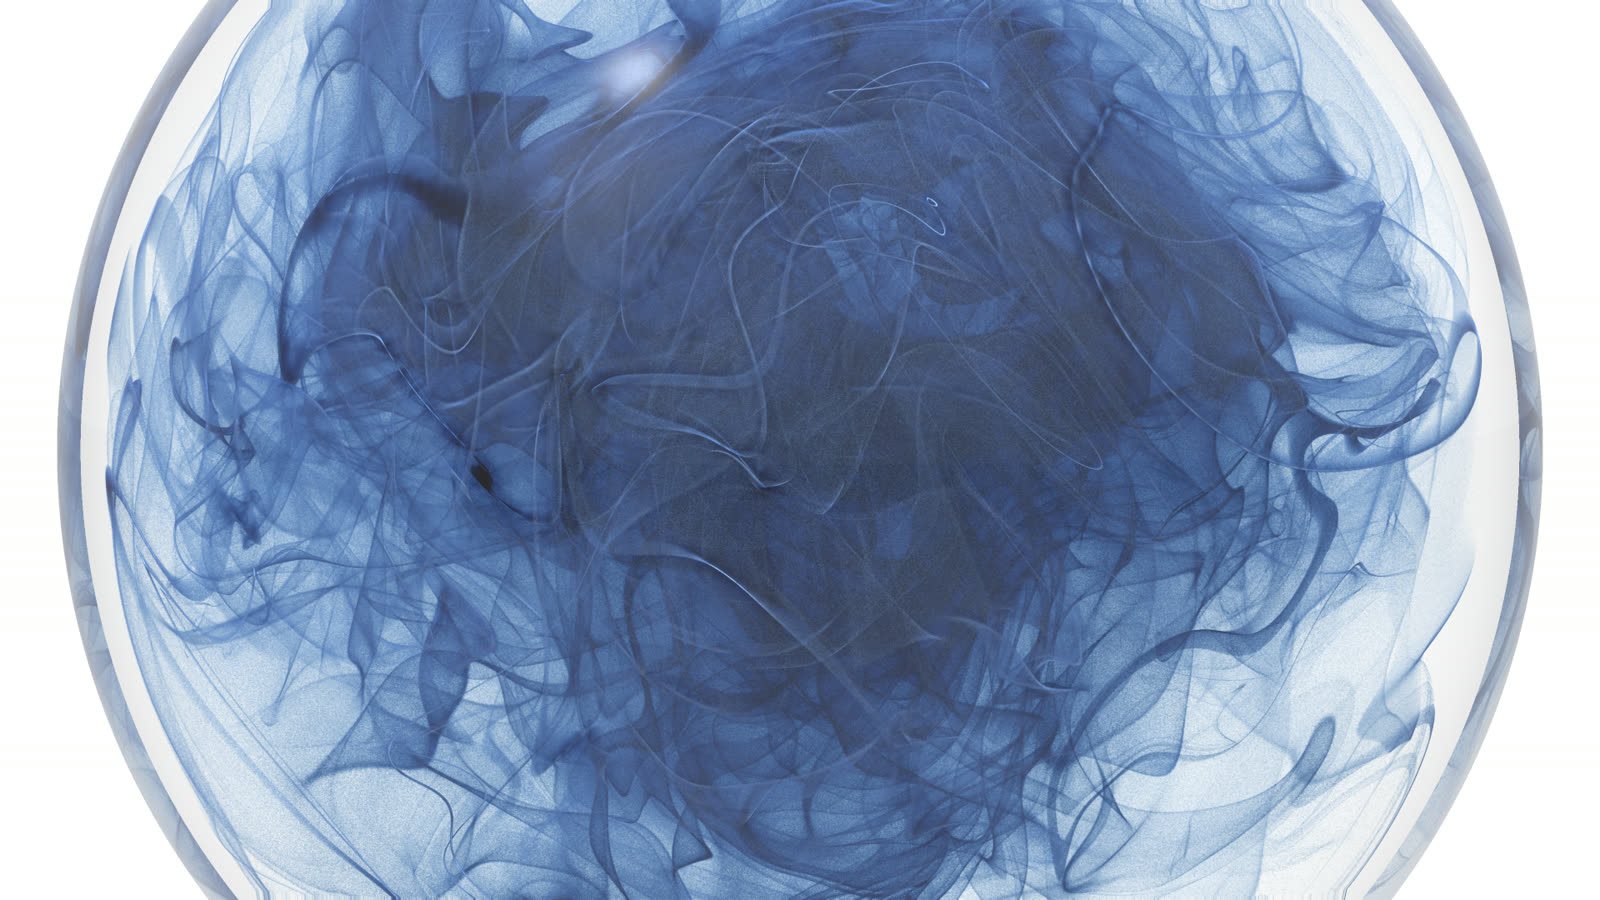
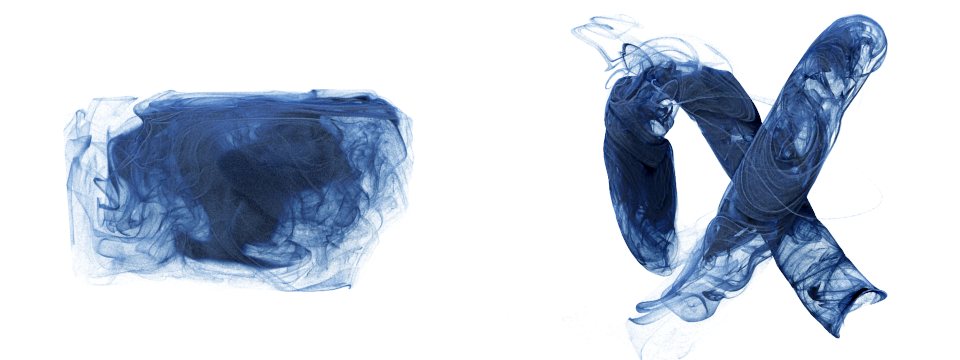
Panel by panel, rollout by rollout, in the order they appear. Range and default sit next to each control. On this page each control also has the full explanation and when to change it.
Orb FX Studio panel
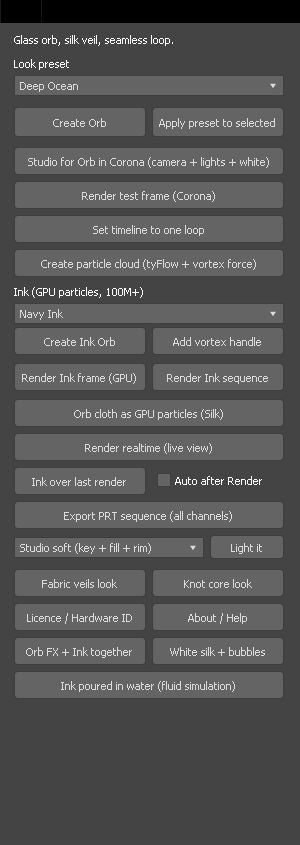
The Orb FX Studio panel (the Orb FX button, in Customize User Interface under VanguardFX) creates orbs, ink looks, studios and lights, and runs renders and exports with one click. Its controls are listed here from top to bottom.
Glass orb, silk veil, seamless loop.A caption at the top of the panel; it does nothing.
A caption at the top of the panel. It does nothing.
Look preset Deep Ocean, Sapphire, Ice Glass, Liquid Silk, Dark Crystal · default Deep OceanSets the veil shape and colours used by Create Orb; pick it before you create the orb.
Chooses the look that Create Orb, Apply preset to selected and the two studio buttons use. A look sets the veil shape (Veil count, Veil rest radius, Veil arc span (deg), Veil width, Veil latitude, Pleat depth and Seed) and the colours of the orb's materials. Pick it before you press Create Orb. Changing the list on its own does not change an orb that already exists.
Create OrbCreates an orb at the world origin with the chosen look and a four-slot material.
Creates a Vanguard Orb FX object (Radius 50) at the world origin with the chosen look preset and selects it. The object gets a four-slot Multi/Sub-Object material: Glass shell, Haze volume, Silk veil (front) and Silk veil (back). The materials are Corona Physical when Corona is installed, and Physical Material when it is not.
Apply preset to selectedApplies the chosen look to one selected orb; it replaces the material and loses your edits.
Applies the chosen look preset to the selected Orb FX: its veil shape values and a newly built material. Select exactly one Orb FX first. The button replaces the object's material, so any changes you made to that material are lost.
Studio for Orb in Corona (camera + lights + white)Builds a white camera-and-lights studio around the orb; keep the orb at the world origin.
Deletes any earlier "Orb Studio - " objects and builds a white studio for the selected Orb FX, creating an orb first if none is selected. The studio has a target camera "Orb Studio - Camera", three Corona lights (Top, Front and Rim) and a white background, with Corona set as the renderer at a 40-pass limit. The viewport then switches to the new camera. Without Corona you get a Skylight and a spot light instead. The camera and lights are placed around the world origin and sized to the orb's Radius, so keep the orb at the origin.
Render test frame (Corona)Renders a 512 x 512 test of frame 0 to a PNG; reset your output size before a final render.
Renders frame 0 with the current renderer through Orb Studio - Camera at 512 x 512 and 40 passes, and builds the studio first if it is missing. The image is saved as <project>\renderoutput\VanguardOrbFX\OrbFX_test.png, and the frame buffer does not open. If no Orb FX is selected, the button creates a new orb first. It also sets the Render Setup output size to 512 x 512, so set your own size again before a final render.
Set timeline to one loopSets the time segment to exactly one loop of the orb; use it before rendering a seamless loop.
Sets the active time segment to exactly one loop of the selected Orb FX: frames 0 to (Loop seconds x frame rate / Speed) - 1. The frame after the last one matches frame 0. Use it before you render a seamless loop. For example, 9 s at 30 fps with Speed 1 gives frames 0-269.
Create particle cloud (tyFlow + vortex force)Creates a tyFlow particle cloud driven by a vortex force; requires tyFlow and sets 30 fps.
Creates a tyFlow "Orb Particle Cloud" of 200,000 particles at the world origin. The particles are born at frame 0 on a hidden sphere and are driven by a new Vanguard Orb Vortex Force, "Orb Vortex Force" (10 whirlpools, 9 s loop). The cloud takes the selected Orb FX's Radius, or 50 if no orb is selected. Requires tyFlow. It also sets the scene to 30 fps and the timeline to 0-269. To change the particle count, edit the tyFlow Birth operator.
Ink (GPU particles, 100M+) Navy Ink, Silk Veils, Swirl Globe · default Navy InkChooses the starting look for Create Ink Orb; every value can be changed afterwards.
Chooses the starting look for Create Ink Orb. Navy Ink splits the ink about evenly between Veil sheets and Ink drops, Silk Veils is almost all Veil sheets, and Swirl Globe puts more than half of the ink on the Glass skin. Pick it before you press Create Ink Orb. You can change every value on the object afterwards.
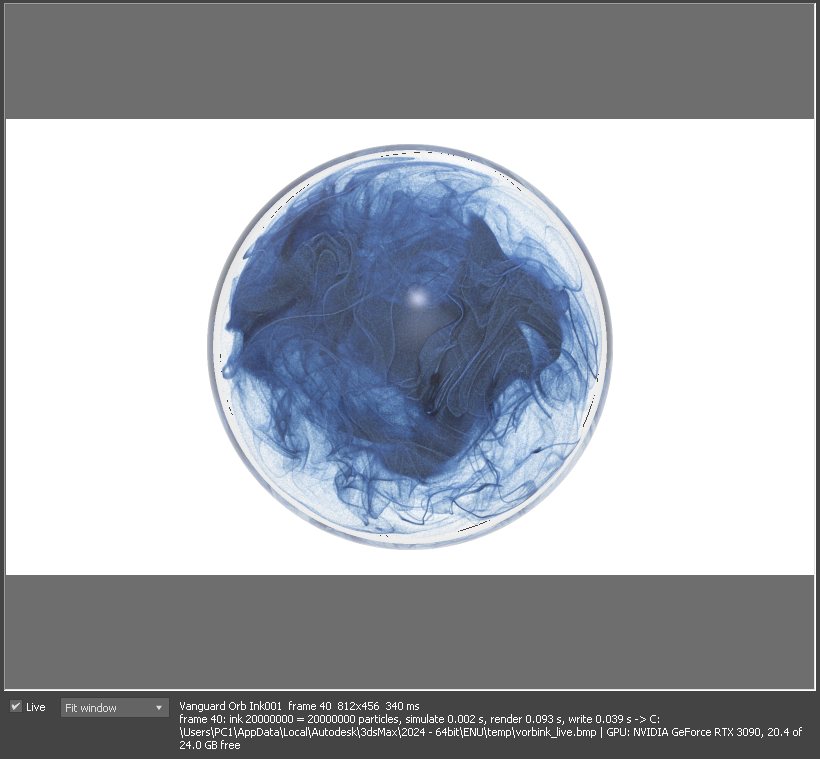
Create Ink OrbCreates an Ink orb at the world origin; Max's Render does not show it, use the Ink buttons.
Creates a Vanguard Orb Ink object (Radius 50) at the world origin with the chosen Ink preset and selects it. The ink is drawn only by the plugin's own GPU renderer. Max's Render does not show it, so use the Ink render buttons below.
Add vortex handleAdds a helper the ink swirls around; move, rotate or animate it to steer the swirl.
Adds an orange Point helper "Ink Vortex" next to the selected Ink and puts it in that Ink's Vortex objects list. The ink swirls around the helper's local Z axis. Select exactly one Ink first. Move, rotate or animate the helper to steer the swirl. The helper's User Properties contain strength=20, which overrides Object vortex strength.
Render Ink frame (GPU)Renders the current frame of every Ink to PNG through the active camera to check quality.
Renders the current frame of every Ink in the scene with the GPU renderer, through the active camera at the Render Setup output size. Each image is saved as <project>\renderoutput\VanguardOrbInk\<object name>_<frame>.png and opened in a window. Use it to check one final-quality frame. In a Perspective view that has no camera, a hidden camera that matches the view is used.
Render Ink sequenceRenders every Ink over the Render Setup frame range to a folder of PNG files.
Asks for a folder, then renders every Ink in the scene through the active camera to <folder>\<object name>_####.png. It follows the Render Setup output size, Every Nth Frame and frame range: Single, Active Time Segment or Range. If Frames is chosen, it renders the active time segment instead. Use it for final frames. It writes PNG only. For EXR render passes, use $.renderSequence with an .exr file name.
Orb cloth as GPU particles (Silk)Creates an Ink that draws the orb's veil as silk particles; tick Ink tracers on to add ink.
Creates an Ink named "<orb name> Silk" at the selected Orb FX, or at the first Orb FX in the scene. In the new Ink, Ink tracers on is unticked and the orb is set as Cloth source, so the GPU renderer draws the orb's veil as 100,000,000 silk particles. Tick Ink tracers on in the new object to add ink to the cloth.
Render realtime (live view)Opens a live preview of the Ink while you tune; use Half or Quarter if it lags.
Opens a resizable window that re-renders the selected Ink, or the first Ink in the scene, several times a second. It renders the current frame through the active camera, so each parameter change shows at once. Keep it open while you tune. If it lags, choose Half (fast) or Quarter (fastest) in the window, or untick Live to pause it. Nothing is saved.
Ink over last render / Auto after Render Auto after Render: on/off · default offComposites every visible Ink over Max's last render; render with the viewport's camera.
Renders every visible Ink over the last image 3ds Max rendered (Corona, V-Ray, Arnold or Scanline), through the active viewport's camera at the current frame. Nearer orbs are drawn over farther ones. Each Ink saves <project>\renderoutput\VanguardOrbInk\<object name>_over_####.png; the nearest Ink's file contains all of them and is the one opened. Auto after Render repeats this after every frame Max renders. Render with the camera the viewport shows, and keep the Render Setup size the same as the rendered image.
Export PRT sequence (all channels)Exports Ink particles as one PRT file per frame for Krakatoa, Frost or tyFlow.
Asks for a folder and writes one <object name>_####.prt file per frame over the Render Setup frame range. It exports each selected Ink, or every Ink in the scene if none is selected. Each file holds Position, Density and every channel ticked in the PRT export channels (Krakatoa, Frost, tyFlow) rollout. Use it to take the particles into Krakatoa, Frost or tyFlow. Untick channels you do not need to make the files smaller.
(lighting list, no label) / Light it Studio soft (key + fill + rim), Backlit glow, Top light, dark mood, Warm / cool split, Underwater blue, Clear (remove preset lights) · default Studio soft (key + fill + rim)Creates a set of omni lights around the Ink and tunes its shading; each press replaces the set.
Light it deletes any lights named "Ink Light ..." and creates the chosen set of shadowless omni lights around the first selected Ink, or the first Ink in the scene. The lights are placed relative to the active camera. The button puts the new lights in that Ink's Only these lights list, ticks Light with the scene's lights, and sets Scatter amount, Self shadow, Ambient, Light intensity and the background colour to suit the set. Clear (remove preset lights) deletes the lights, unticks Light with the scene's lights, and resets those values and the background to white. These are ordinary Max lights, so they also light a Corona or V-Ray render. Each press replaces the previous set.
Fabric veils lookCreates a petal mesh with veil and droplet Inks; render both, then lay droplets over veils.
Creates an animated, non-rendering "Ink petals" mesh of 8 twisted sheets and two Inks that use it. "Fabric veils" has 60,000,000 silk particles with Falloff on for dark blue folded edges, no glass and a light grey background. "Fabric droplets" has 5,000 cyan droplets thrown off the frayed edges, on a transparent background. Render both, then lay the droplet image over the veil image. Any UV-mapped mesh can replace the petals as Cloth source.
Knot core lookCreates a morphing knot mesh with veil, smoke and droplet Inks to composite together.
Creates a morphing, non-rendering "Ink knot" mesh: a knotted core with six arms that reach the sphere wall, animated by Noise and Twist modifiers. Three Inks use it: "Knot veils" (60,000,000 silk particles on a light grey background), "Knot smoke" (15,000,000 ink tracers rising from its surface) and "Knot droplets" (5,000). Smoke and droplets render on a transparent background, so you can composite them over the veils.
Licence / Hardware IDOpens the licence window with your Hardware ID; use it once on each machine.
Opens the licence window. It shows this machine's Hardware ID with a Copy button, an Open panel button for vanguardfx.pro/panel.php (where you download the licence), a box to paste the whole licence, and the Activate and Later buttons. Use it once on each machine. Afterwards the status line shows the licence state.
About / HelpShows a short workflow summary and offers to open this guide.
Shows a short workflow summary and offers to open this guide: VanguardOrbFX_Guide.html in C:\Program Files\VanguardFX\OrbFX, or vanguardfx.pro if the guide is not found.
Orb FX + Ink togetherDraws Orb FX veils inside the Ink's glass in one image; render with the Ink render buttons.
Adds every Orb FX in the scene to the Scene objects to render list of the selected Inks, or of all Inks if none is selected, and makes the Orb FX objects non-renderable. The GPU renderer then draws the Orb FX veil inside the Ink's glass in one image. The veil is drawn without its own glass, in its material's diffuse colours. Render with the Ink render buttons. To undo, remove the orb from the list and turn its Renderable property back on.
White silk + bubblesCreates a ready-made dark poster look of white silk; raise Silk density for more opacity.
Creates an "Ink petals" mesh and one Ink, "White silk": sheer white silk of 40,000,000 particles inside the glass sphere, with 60 air bubbles, on a near-black background. Use it as a ready-made dark poster look. Silk density is set to 0.22; raise it for more opaque silk.
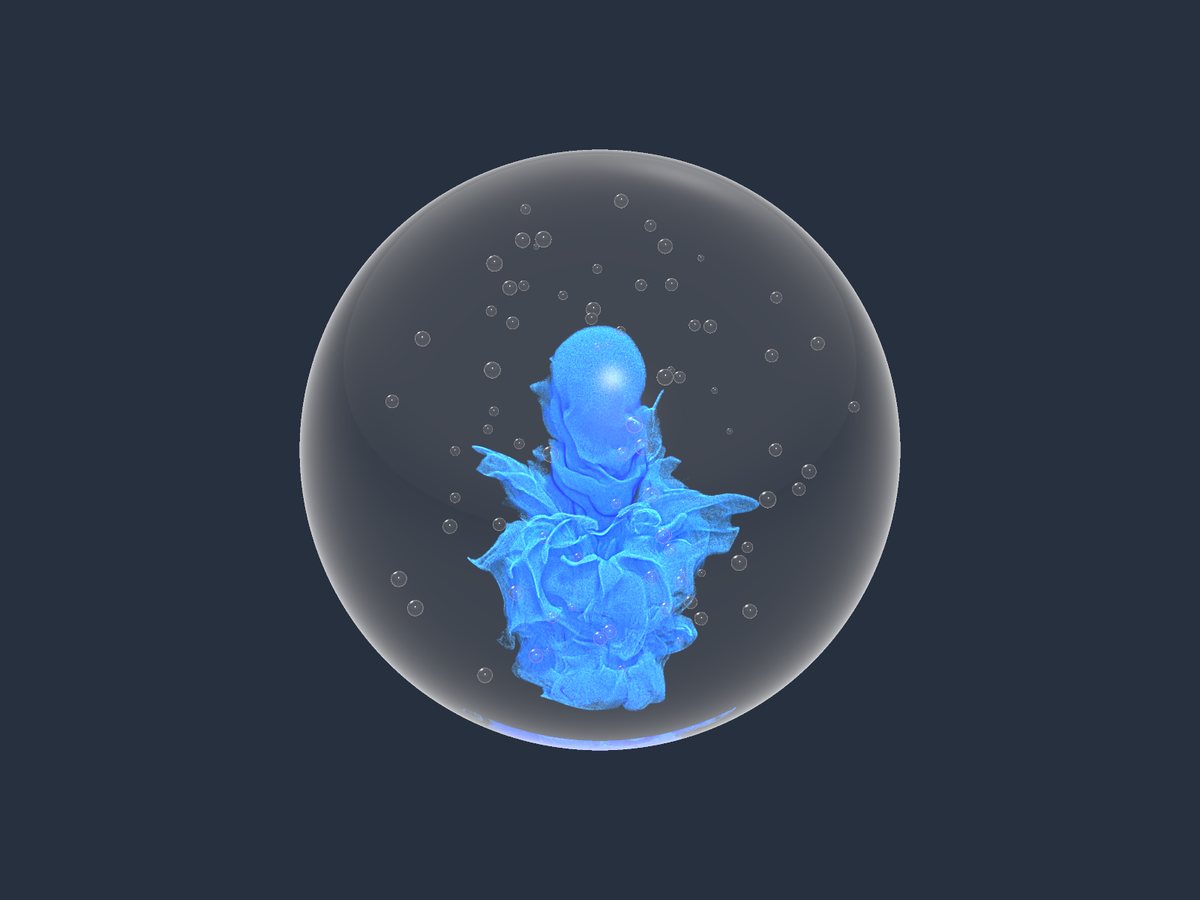
Ink poured in water (fluid simulation)Creates ink poured into simulated water; the first update can take a while to compute.
Creates an Ink, "Ink in water", with Ink tracers on unticked and Ink in water on ticked. 40,000,000 blue ink particles pour from 0.3 radii above the centre and are carried by simulated water (Water resolution 128) up to frame 150 or the end of the timeline, whichever is later. It adds 80 air bubbles on a dark background. The whole water simulation is computed once, when the Ink is first shown, and is reused for every frame until you change a water setting. The first update can take a while.
Status line (below the buttons)Reports the last button's result; read it when a button seems to do nothing.
Reports the result of the last button: the objects it created, the file it wrote, or what is missing (for example "Select one Vanguard Orb FX object."). Read it when a button seems to do nothing.
Orb Ink - Ink Particles
Sets the size of the orb, how many tracer particles there are, the shapes they start from before the flow takes over, and the vessel that holds them.
Radius 0.01-100,000 · default 50Sets the glass sphere size; start shapes, vortices and the wall layer all scale with it.
Radius of the glass sphere in scene units; the start shapes, vortex sizes, the wall layer and the rendered glass all scale with it. Most other sizes are fractions of the radius, so a resized orb keeps its look, except Turbulence strength (see Flow).
Render particles (0 = all the GPU holds) / Viewport particles 0-2,000,000,000; 1,000-5,000,000 · default 20,000,000; 300,000Tracer particles for renders and export; more render smoother, 0 uses ~80% of free GPU memory.
How many tracer particles are used for renders and PRT/VDB export, and how many of the same particles are shown as dots in the viewport. More particles render smoother at the same overall darkness; 0 uses about 80% of the free GPU memory, and counts larger than the GPU holds stream through system RAM, more slowly.
Seed 0-1,000,000 · default 42Reshuffles start shapes and turbulence; try a few seeds to find a composition first.
Changes the random placement of every start shape (sheets, drops, dust, skin, mesh points) and the turbulence pattern, with all other settings unchanged. Try a few seeds to find a composition before fine-tuning; Vortex seed varies the vortices separately.
Veil sheets / Ink drops / Volume dust / Glass skin / Emitter meshes 0-10 each · default 0.5; 0.48; 0.02; 0; 1Splits particles among sheets, drops, haze, skin and meshes; only the ratios matter.
Share of the particles that start as thin curved sheets, compact drops, an even haze through the volume, a thin layer just inside the glass, or on the emitter meshes. Only the ratios matter, and Emitter meshes counts only when the list below holds meshes; set the others to 0 to start from one shape.
Sheet count / Sheet size / Sheet thickness / Sheet bend 0-64; 0.05-2; 0-0.1; 0-4 · default 8; 1; 0.0015; 1Count, spread, thickness and bend of the starting veils; set sheets to 0 to remove them.
How many starting veils there are, how far each spreads from its centre and how thick it is (both as fractions of the radius), and how strongly it is bent instead of flat. To remove sheets set Veil sheets to 0: with Sheet count 0 their share starts on the glass skin instead.
Drop count / Drop size 1-64; 0.005-0.6 · default 4; 0.07Dense ink drops near the centre; a few small ones read as ink just dropped into water.
Number of dense ink drops, placed at random within about half the radius of the centre, and their size as a fraction of the radius; the flow unravels them into filaments. A few small drops read as ink just dropped into water; many large ones fill the orb with cloud.
Emitter meshes (particles start on their surface)Emits the mesh share from these surfaces; keep meshes inside the orb, animation is ignored.
The Emitter meshes share of the particles starts spread evenly over the surface of the meshes in this list. Keep the meshes inside the orb, as parts outside are pulled in to its edge; each mesh is read at a single frame, so animating it has no effect.
Ink tracers on on/off · default onToggles the ink tracers; turn off when using only silk, a PRT sequence or ink in water.
Switches the ink tracer particles on or off in the viewport, renders and exports, while the object's other sources (Particle Silk, Surface Swirl, PRT input, Ink in Water) keep working. Switch it off when the object is used only for particle silk, a PRT sequence or ink in water.
Show the sphere outline in the viewport on/off · default onShows a non-rendering wire sphere; turn it off once your own glass or Container is in place.
Draws a wire sphere of the orb's radius in the viewport; it never renders. Turn it off to unclutter the viewport once your own glass model or a Container is in place.
Container (any closed mesh instead of the sphere) / Container detail (distance grid) 16-256 (detail) · default none; 96Uses a closed mesh as the vessel; centre it and set Radius to about half its largest size.
Uses any closed mesh as the vessel instead of the sphere: particles stay inside it, the flow slides along its walls and the rendered glass sphere is switched off; detail is the number of distance-grid cells across the mesh's largest side. Centre it on the orb and set Radius to about half its largest size, since start shapes, vortices and the VDB export box are sized from Radius; raise detail for sharp corners or thin parts.
Orb Ink - Flow
Controls time and the turbulence that carries every particle: the loop, the simulation steps, the curl-noise churn and the behaviour at the glass.
Loop seconds / Seamless loop (two generations) / Start frame (no loop) 0.5-120; on/off; -100,000 to 100,000 · default 9; on; 0Sets the flow cycle length and seamless looping; turn the loop off for one-off unravelling.
Loop seconds is the length of one flow cycle, which also times the turbulence drift and vortex motion; with Seamless loop on, two overlapping generations of particles restart and cross-fade so the last frame flows into the first, and with it off the simulation starts once at Start frame and keeps running. For a loop render frames 0 to Loop seconds x frame rate - 1 (0-269 for 9 s at 30 fps); turn the loop off for a one-off shot where the ink keeps unravelling.
Time scale 0-20 · default 1Speeds up or slows the whole flow without changing loop timing; 0 holds the start shapes.
Multiplies how far the particles travel each frame without changing the timing of the loop or of the vortex motion; 0 holds them at their start shapes. Use it to speed up or slow down the whole flow at once instead of changing each strength.
Substeps per frame 1-16 · default 2Simulation steps per frame; raise to 4-8 if particles spiral out of vortex cores.
Number of simulation steps per frame; more steps follow fast, tight swirls more accurately, and simulation time grows with them. Raise it to 4-8 when strengths or Time scale are high and particles spiral out of the vortex cores.
Turbulence strength 0-500 · default 3.6Turbulence speed that stretches ink into filaments; scale it yourself when resizing the orb.
Typical speed of the curl-noise turbulence, in scene units per second, that stretches the ink into sheets and filaments. It does not follow Radius, so scale it with the radius when you resize the orb; 0 leaves only the vortices and spin.
Turbulence scale / Turbulence detail 0.05-20; 1-6 · default 0.75; 3Eddy size and noise layers; detail 1-2 keeps veils smooth, 4-6 gives ragged, smoky edges.
Scale sets how many turbulence eddies fit across the radius (higher gives smaller, busier swirls); detail adds finer layers of noise on top. Lower the scale for big, slow folds; detail 1-2 keeps the veils smooth, 4-6 gives ragged, smoky edges.
Turbulence evolve 0-10 · default 0.7How far turbulence drifts per loop; raise it for restless water, lower for steady stretching.
How far the turbulence pattern drifts during one loop, returning to its start at the end of the loop; at 0 the pattern stands still while the particles move through it. Raise it for restless water, lower it for slow, steady stretching.
Glass wall softness 0.01-0.5 · default 0.12Wall layer where flow slides along the glass; raise for calmer flow, lower for swirls at wall.
Thickness of the layer next to the glass (or container wall), as a fraction of the radius, in which the flow turns to slide along the wall instead of into it. Raise it for a smoother, calmer flow along the glass; lower it to let swirls press right up to the wall.
Global spin (rad/s) -10 to 10 · default 0.08Rotates the whole fluid around local Z in radians per second; negative turns the other way.
Turns the whole fluid as one body around the object's local Z axis, in radians per second; negative values turn the other way. 0.08 is about 4.6 degrees per second; set 0 for no overall rotation.
Orb Ink - Vortex Forces
Adds rotating currents on top of the turbulence: whirlpools under the glass, vortex tubes inside the orb, and scene objects used as vortex handles.
Surface whirlpools / Whirlpool strength 0-48; -500 to 500 · default 8; 16Whirlpools spread over the glass and their speed; a negative value reverses them all.
Number of whirlpools spread evenly over the glass, each turning in a random direction, and how fast they turn. Strength follows Radius, so the look survives a resize; a negative value reverses every whirlpool.
Whirlpool size (deg) / Whirlpool depth / Whirlpool wander 1-89; 0.02-1; 0-3 · default 26; 0.6; 0.6Whirlpool width, depth and wander; low depth keeps swirling at the surface, wander 0 pins them.
Width of each whirlpool as an angle seen from the centre, how deep under the glass it reaches as a fraction of the radius (1 = to the centre), and how far it drifts around its home position during a loop. Low depth keeps the swirling at the surface (the Swirl Globe preset uses 0.35); wander 0 pins the whirlpools in place.
Inner vortices / Inner strength 0-48; -500 to 500 · default 5; 15Vortex tubes that fold ink deep inside the orb; set 0 to leave the inside to other motion.
Number of vortex tubes crossing the inside of the orb at random positions and angles, each turning in a random direction, and how fast they spin. They fold the ink deep inside, away from the glass; set 0 to leave the inside to the turbulence, spin and whirlpools.
Inner core size / Inner length / Inner orbit 0.01-2; 0.02-4; 0-6.3 · default 0.3; 0.6; 0.5Inner vortex thickness, length and swing; a thin, strong core twists a tight thread.
Thickness and length of each inner vortex as fractions of the radius, and how far its axis swings back and forth during a loop, in radians. A thin core with high strength twists a tight thread; a wide core turns a whole region slowly.
Vortex seed 0-1,000,000 · default 42Repositions whirlpools and inner vortices without changing start shapes; use if motion is unbalanced.
Picks different positions, axes and turning directions for the surface whirlpools and inner vortices, without changing the particles' start shapes. Change it when the motion looks unbalanced; Seed changes the start shapes instead.
Object vortex strength / Object vortex core / Object vortex length / Vortex objects (local Z = axis; User Props strength= core= length=) -500 to 500; 0.01-2; 0.02-10 · default 15; 0.2; 0.6; noneTurns listed scene objects into animated vortices spinning fluid around their local Z axis.
Turns the scene objects in the list into vortices that spin the fluid around their local Z axis at their pivot and follow their animation, using the Object vortex strength, core and length values (core and length as fractions of the radius). Add vortex handle (Orb FX Studio) creates a Point with strength=20 in its User Defined properties, which overrides Object vortex strength; with Seamless loop on, only the first loop of an object's animation is used.
Orb Ink - Vanguard Ink Render
Settings for the plugin's own GPU renderer, used by the live view, Render Ink frame (GPU), Render Ink sequence and Ink over last render: ink shading and lighting, the glass, background and alpha, mattes, bubbles and output; a Vanguard Ink Material in the Particle material slot overrides the ink shading values set here.
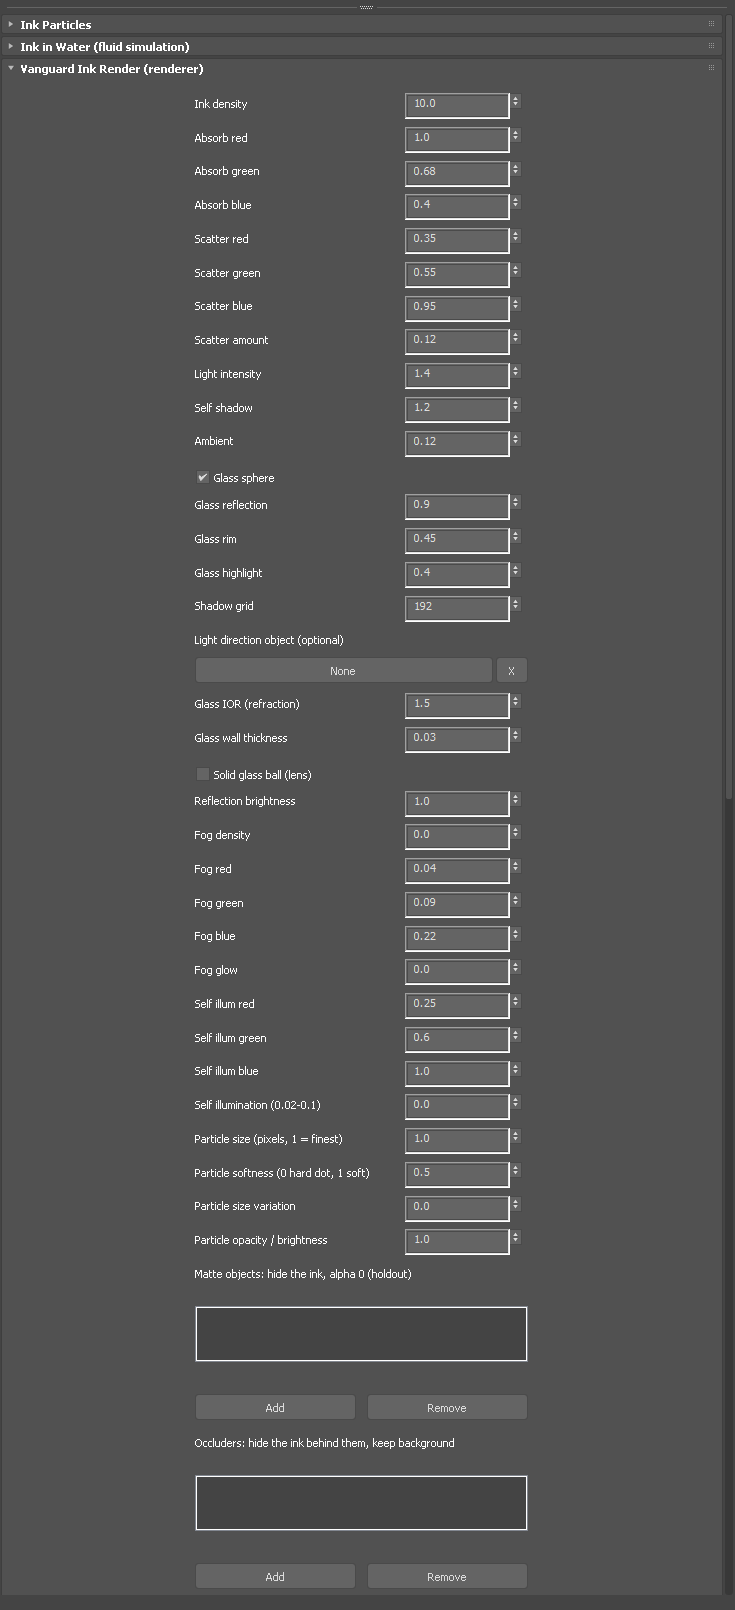
Ink density 0-1,000 · default 10Raise for darker, denser ink; more particles at the same value make it smoother, not darker.
Sets how dark and opaque the ink tracer particles are, independent of the particle count (silk, swirl, water and PRT particles have their own density). Raise it for denser, darker ink. Adding particles at the same value makes the ink smoother, not darker.
Absorb red / Absorb green / Absorb blue 0-10 · default 1 / 0.68 / 0.4Sets how much colour the ink absorbs; the ink shows the colour it absorbs least.
Sets how strongly the ink absorbs red, green and blue light passing through it, which gives the ink its colour against a light background. The ink shows the colour it absorbs least: the default absorbs red most and reads as navy blue. A colour map at full Colour strength, or a Vanguard Ink Material, replaces these values.
Scatter red / Scatter green / Scatter blue / Scatter amount 0-10 · default 0.35 / 0.55 / 0.95; amount 0.12Brightens the lit side; keep it around 0.1-0.15 to avoid salt-and-pepper noise.
Sets the colour of the light the lit ink scatters toward the camera and how much of it there is, which brightens the lit side of the ink. Keep the amount around 0.1-0.15. Higher values cause salt-and-pepper noise at about 20 million particles.
Light intensity 0-100 · default 1.4Sets the brightness of the light on the ink; raise it when the ink looks dull.
Sets the brightness of the light on the ink. This is the built-in key light, or the brightest scene light when the scene's lights are used (the other lights keep their ratio to it). Raise it when the ink looks dull. With scene lights it is multiplied by Scene light strength.
Light direction object (optional)Pick a Point helper to aim the built-in key light; without one, light comes from above.
Aims the built-in key light so that it shines from this object's position, as seen from the orb's centre. Only used when no scene light lights the ink. Pick a Point helper and move it to place the light; without one, the light comes from above.
Self shadow 0-20 · default 1.2Sets self-shading; lower for flatter ink, raise for deeper shading in folds.
Sets how strongly the ink shades itself: the ink between a particle and the light dims the light that reaches it. The same strength sets the ink's shadow on scene objects. Lower it for flatter, more luminous ink. Raise it for deeper shading inside folds and swirls.
Ambient 0-10 · default 0.12Adds flat light to every particle so shaded parts never go fully dark.
Adds flat light to every particle regardless of shadow, so shaded parts never go fully dark. Raise it to lift the shadow side. HDRI light on the ink is added on top of it.
Shadow grid 32-512 · default 192Grid resolution for shadows; raise to 256-384 if shadows look blocky in close-ups.
Sets the resolution of the 3D grid used for self-shadowing, absorption through the ink, veil normals and shadows on scene objects. Raise it to 256-384 when shadows look blocky in close-ups. GPU memory grows with the cube of the value: about 0.3 GB at 192, 2.3 GB at 384 and 5.4 GB at 512.
Self illum red / Self illum green / Self illum blue / Self illumination (0.02-0.1) colour 0-10; amount 0-100 · default 0.25 / 0.6 / 1; amount 0Makes the ink glow without light; 0.02-0.1 is the useful range and 0 is off.
Makes the ink glow in this colour without any light. Denser areas glow more, and ink in front still absorbs the glow. An amount of 0 is off; 0.02-0.1 is the useful range. The glow is also written to the emission EXR pass.
Particle size (pixels, 1 = finest) 0-64 · default 1Sets each particle's footprint; raise to 2-4 if a low particle count looks grainy.
Sets the on-screen footprint of each particle in pixels. A larger particle spreads the same amount of ink over more pixels instead of adding more ink. Raise it to 2-4 when a low particle count looks grainy. Keep 1 for the finest silk detail.
Particle softness (0 hard dot, 1 soft) / Particle size variation 0-1 · default 0.5 / 0Softens particle footprints and randomises their size; variation breaks up a uniform grain.
Softness blends each particle's footprint from a flat disc (0) to a soft Gaussian falloff (1). Size variation makes each particle randomly larger or smaller by up to this fraction. Softness only shows when Particle size times Antialiasing is above 1.5. Use variation to break up a uniform grain.
Particle opacity / brightness 0-100 · default 1Thins or thickens the ink on screen for every group while keeping the self-shadow.
Multiplies how much every particle, of every group, darkens and lights the image, without changing the self-shadow. Use it to thin or thicken the ink on screen while keeping the shading; Ink density changes both, for the ink tracers only. A standard material's opacity in the Particle material slot multiplies it.
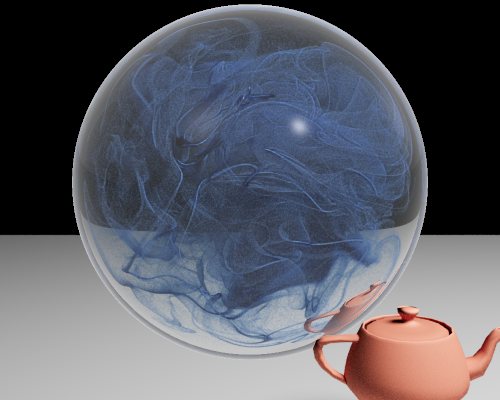
Glass sphere on/off · default onDraws a glass shell around the ink; turn it off to render the ink or silk on its own.
Draws a glass shell just outside the Radius, with reflection, refraction, rim darkening and highlights. Turn it off to render the ink or silk on its own. Fog, bubbles and caustics need it, and it switches off automatically when a container object of another shape is used.
Glass reflection 0-4 · default 0.9Sets the Fresnel glass reflection; 0 removes it, above 1 carries it further across.
Sets the strength of the glass reflection, which follows Fresnel: it is strongest at the edge of the sphere and faint where the glass faces the camera. Raise it above 1 to carry reflections further across the face. 0 removes them.
Glass rim 0-1 · default 0.45Darkens the view through the glass toward the silhouette; raise for a heavier edge.
Darkens what is seen through the glass toward the sphere's silhouette, like the dark edge of a real glass ball. Raise it for a heavier, more defined edge. At 1 only the reflection is left at the very edge.
Glass highlight 0-20 · default 0.4Sets the brightness of each light's sharp highlight on the glass; 0 removes them.
Sets the brightness of the sharp highlight that each light makes on the glass. Raise it for a crisp highlight; 0 removes the highlights from the glass (bubbles keep their own).
Glass IOR (refraction) / Glass wall thickness / Solid glass ball (lens) IOR 1-3; thickness 0.001-0.5; on/off · default 1.5; 0.03; offControls how the glass bends the view; a thicker wall bends the ink more near the edge.
Controls how the glass bends what is seen through it: the index of refraction (which also sets the Fresnel reflection strength), the wall thickness as a fraction of the radius, or a solid glass ball that acts as a lens. A thicker wall bends the ink more near the edge. Solid glass ball magnifies the inside and shows the background upside down, and wall thickness is then ignored.
Glass reflects: 0 studio, 1 HDRI, 2 colour, 3 nothing / Reflection colour R / Reflection colour G / Reflection colour B mode 0-3; colour 0-10 · default 0 (studio); 1 / 1 / 1Chooses what glass and bubbles reflect; HDRI mode falls back to the studio without one.
Chooses what the glass and the bubbles reflect: a built-in studio (bright top, darker floor, two soft highlights), the HDRI, the flat Reflection colour, or nothing. Mode 1 needs an HDRI in Colour, Lights and HDRI; without one the studio is used. Mode 3 also removes the light highlights on the glass.
Reflection brightness 0-20 · default 1Scales everything the glass and bubbles reflect; lower it when reflections wash out the ink.
Multiplies the brightness of everything the glass and the bubbles reflect. An HDRI used as the background or as light on the ink is scaled with it. Lower it when reflections wash out the ink near the edge of the orb.
Fog density / Fog red / Fog green / Fog blue / Fog glow density 0-100; colour 0-10; glow 0-100 · default 0; 0.04 / 0.09 / 0.22; 0Fills the glass with tinted fog; start at 0.1-0.3 for a sense of depth.
Fills the inside of the glass with even, tinted fog that veils the ink and background behind it. Glow brightens the fog colour so it gives off light. Start at 0.1-0.3 for a sense of depth; at 1 the centre is mostly fog. Fog needs Glass sphere on, and glow does nothing while Fog density is 0.
Background: 0 colour, 1 transparent, 2 HDRI / Background colour R / Background colour G / Background colour B mode 0-2; colour 0-10 · default 0 (colour); 1 / 1 / 1 (white)Sets what is behind the orb; use 1 for compositing.
Sets what is behind the orb: a flat colour, transparency, or the HDRI loaded in Colour, Lights and HDRI. Use 1 for compositing: PNG is saved with straight alpha and EXR premultiplied. Ink over last render replaces the background with the rendered image.
Alpha: 0 ink only, 1 ink + glass reflection, 2 opaque sphere 0-2 · default 1Sets what is solid in alpha when transparent; use 2 if the plate must not show through.
With a transparent background, sets what is solid in the alpha channel: only the ink, the ink plus the glass reflection and rim, or the whole sphere. Only applies when Background is 1. Use 2 when the plate behind must not show through the orb.
Background behind the orb (radii, for refraction) 0-1,000 · default 4Places the Ink over last render backdrop behind the orb so the glass refracts it correctly.
When the ink is rendered over another renderer's image, places that image as a flat backdrop this many orb radii behind the orb's centre, so the glass refracts it correctly. Match the real distance: a backdrop 1 m behind an orb with a 25 cm radius is 4. It has no effect unless you use Ink over last render.
Matte objects: hide the ink, alpha 0 (holdout) / Occluders: hide the ink behind them, keep background / Mattes also cut the glass on/off (checkbox) · default empty; empty; onObjects that hide the ink behind them so it composites with another render.
Matte objects hide the ink behind them and cut a black hole with alpha 0. Occluders hide the ink behind them but show the background. The checkbox makes both also remove the glass where they are in front of it. Add objects that pass in front of or into the orb so the ink composites with another render. Hidden objects are ignored, and holdouts appear in the matte EXR pass.
Antialiasing (1 off, 2-4 = samples per pixel side) 1-4 · default 2Supersamples to smooth edges; use 1 while adjusting and 3-4 for final frames of fine silk.
At 2-4, renders the image that many times larger in each direction, with particles scaled to match, then averages it down to smooth edges and fine threads. Use 1 while adjusting in the live view and 3-4 for final frames of fine silk. Render time and GPU memory grow with the square of the value.
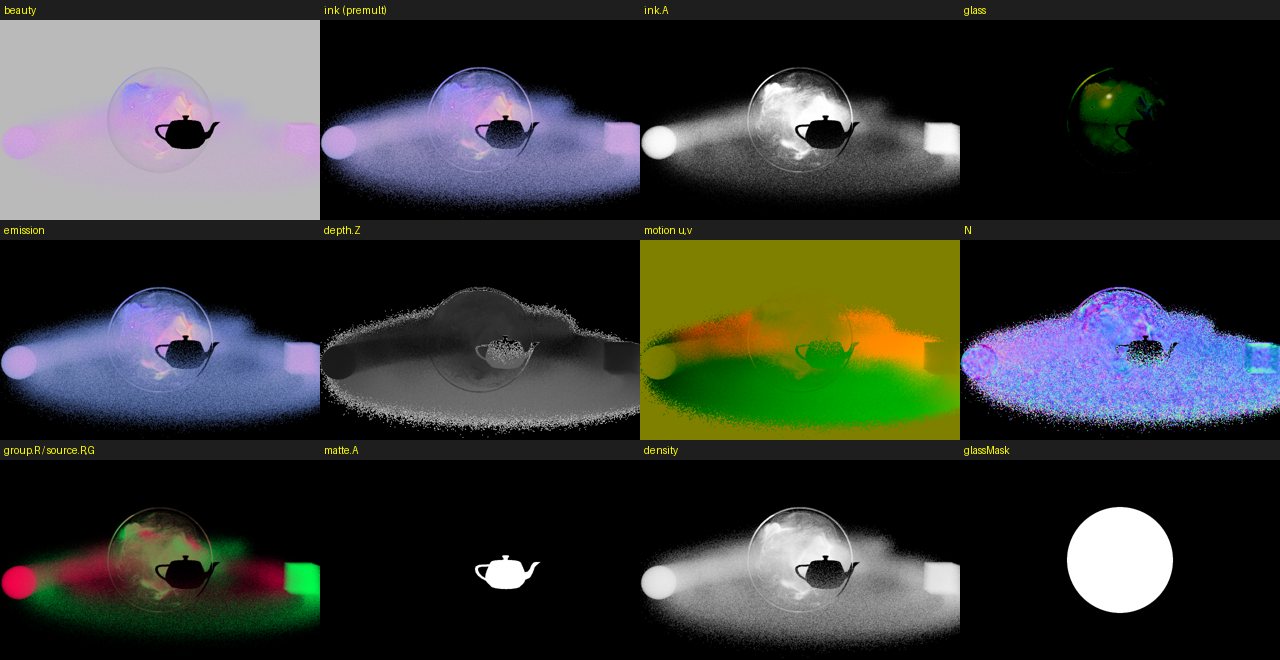
EXR render passes (ink, glass, emission, depth, motion, normal, masks) / EXR full 32-bit float (off = half) on/off · default on; offAdds compositing layers to an EXR; render EXR from MAXScript, as the panel saves PNG.
Adds compositing layers to an .exr file: ink, glass, emission, depth, motion, normals, ink / silk / swirl and Assemble source masks, matte, density and glass mask. The second switch saves the colour layers as 32-bit float instead of 16-bit half. The panel's Render Ink buttons save PNG, so render EXR from MAXScript with renderSequence and an .exr file name. Depth, motion and density are always 32-bit.
Falloff (fabric look: veils denser edge-on) / Falloff: density facing the camera / Falloff: density edge-on / Falloff: curve (higher = only the very edges) on/off; facing 0-10; edge-on 0-20; curve 0.05-10 · default off; 0.35; 2; 2Makes veils denser edge-on and thinner face-on so sheets read like folds of fabric.
Makes veils denser where they turn edge-on to the camera and thinner where they face it, so sheets read like folds of fabric. The curve sets how close to edge-on the effect starts. The Fabric veils look button uses 0.05 facing, 7 edge-on and a curve of 3. Raise the curve to keep the effect to the very edges.
Falloff: edge colour R / Falloff: edge colour G / Falloff: edge colour B / Falloff: edge colour amount 0-1 · default 0.55 / 0.85 / 1; amount 0Tints the edge-on parts of the veils toward this colour; needs Falloff on.
Tints the edge-on parts of the veils toward this colour, used as an ink colour. The amount sets how strong the tint is. Needs Falloff on. Fabric veils look uses dark blue (0.05, 0.25, 0.45) at 0.6 to darken the folds.
Air bubbles in the glass (count, 0 = off) / Bubble size (ratio of radius) / Bubble size variation count 0-2,000; size 0.002-0.2; variation 0-1 · default 0; 0.025; 0.7Adds procedural air bubbles inside the glass; they need Glass sphere on.
Adds procedural air bubbles inside the glass, each a dark ring with a clear centre. Size is a fraction of the orb radius; variation makes some bubbles smaller, down to almost nothing at 1. The White silk + bubbles button uses 60. Bubbles need Glass sphere on, and their placement follows the object's Seed.
Bubble rise speed (radii per second) / Bubble wobble (radii) / Bubble shine (rim + highlight) rise 0-5; wobble 0-0.5; shine 0-5 · default 0.15; 0.04; 1Animates bubbles rising and swaying; set rise and wobble to 0 for still bubbles.
Bubbles rise along the timeline (larger ones faster) and wrap from the top back to the bottom. Wobble sways them sideways, and shine sets how strongly they catch reflections and light highlights. Set rise and wobble to 0 for still bubbles. Lower shine when bubbles look too bright against dark ink.
Orb Ink - Colour, Lights and HDRI
Gives the ink a colour pattern and chooses which lights and which HDRI the Ink renderer uses.
Colour: 0 off 1 Z 2 radial 3 sphere 4 top 5 front 6 X 7 Y 0-7 · default 0 (off)Picks how the colour map is projected onto the ink; it needs a map to do anything.
Sets how the Colour map is projected onto the particles in the ink's local space: a gradient from -Radius to +Radius along Z (1), X (6) or Y (7), radial from the centre out to Radius (2), wrapped around a sphere (3), or flat from the top (4) or the front (5). It does nothing until the Colour map slot (or a Particle material) supplies a map; 1 with a Gradient Ramp gives colour that runs from bottom to top.
Colour map (any texmap: Gradient Ramp, Bitmap...) texture mapMap that colours the ink as seen over white; used only while Colour is set to 1-7.
The map that colours the ink, where each colour is how the ink looks over white, so darker colours absorb more light. A Gradient Ramp gives clean bands and a Bitmap or Noise gives patterned ink; it is only used while Colour is set to 1-7, and then it also replaces the two-colour ramp of Colour by.
Colour strength / Colour map scale 0-1; 0.01-100 · default 1; 1Blends toward the map colour and scales it; lower strength to tint, raise scale to repeat.
Colour strength blends from the ink's own colour (0) to the map colour (1), and Colour map scale squeezes the projection so that above 1 the map repeats inside the ink and below 1 it stretches. Lower the strength to tint the ink instead of recolouring it; raise the scale for stripes or rings.
Colour sticks to the particles (off = planar, fixed in space) on/off · default onOn, colour travels with the flow; turn off to keep a region's colour fixed in place.
On, each ink particle keeps the colour of the point where it was born (silk uses its cloth UV), so the pattern travels with the flow; off, the colour is read at the particle's current position, so the pattern stays fixed in the ink's space. Turn it off when one region of the orb, such as a darker bottom, should keep its colour wherever the ink moves; swirl and PRT particles always use their current position.
Particle material (diffuse colour or map, self-illum, opacity) materialA material here replaces the ink's shading; a Vanguard Ink Material overrides these colours.
A Vanguard Ink Material here replaces the object's own shading; any other material replaces the Colour map at full strength with its diffuse map or colour (projected by Colour, or as a sphere when Colour is 0), adds a glow from its self-illumination and thins the ink by its opacity. With a Vanguard Ink Material assigned, set the colours in the material, because it overrides this rollout's colour controls and Colour by.
Light with the scene's lights / Scene light strength on/off; 0-100 · default on; 1On, up to eight bright scene lights light the ink; off, one default key light is used.
On, the ink is lit by up to eight of the brightest switched-on scene lights (ambient lights excepted), each reduced to a colour and a direction (toward the light from the ink's centre, or along a directional light's axis) with no distance falloff, keeping their ratios and setting the brightest to Light intensity times Scene light strength. Off, or with no usable lights, the ink uses one default key light from above, aimed by the Light direction object when one is set.
Only these lights (empty = every light in the scene) list of lights · default emptyLimits ink lighting to listed lights, even switched-off ones that skip the final render.
Limits the ink to the listed lights, and uses a listed light even when it is switched off. Switch a light off and list it here to light the ink without it affecting the Corona or V-Ray render; the Studio's Light it button fills this list for you.
HDRI file (.hdr .exr .png ...) / HDRI rotation (deg) file path; -360 to 360 · default none; 0Loads an HDRI for background, ambient and reflection; 2K is enough, rotate to place highlights.
Loads an equirectangular image (Z up) that can serve as the background, as ambient light on the ink and, when Glass reflects is set to 1 (HDRI), as the glass reflection; HDRI rotation turns it about the vertical axis. A 2K HDRI is enough, because larger images are halved on loading until they are at most 2,048 pixels wide; rotate to place the brightest part of the image in the glass reflection.
HDRI as background on/off · default offShows the HDRI behind the orb and through the glass instead of the background colour.
Shows the HDRI behind the orb and through the glass in place of the background colour, at the brightness set by Reflection brightness. It is ignored when Background is set to 1 (transparent), and Background 2 (HDRI) shows the HDRI even with this off.
HDRI light on the ink 0-100 · default 1Adds the HDRI's average colour as ambient; set 0 when the HDRI is for reflections only.
Adds the HDRI's average colour to the ink as an even ambient light, multiplied by this value and by Reflection brightness. Set it to 0 when the HDRI is only meant for reflections and should not tint or brighten the ink.
Orb Ink - Particle shading (colour by channel)
Colours each particle from a measured value, such as its speed or height, through a two-colour ramp or the Colour map.
Colour by: 0 off 1 speed 2 age 3 density 4 depth 5 height 6 radius 7 group/source 0-7 · default 0 (off)Picks the value that drives colour, overriding projection; use speed to pick out fast streaks.
Chooses the value that sets each particle's colour: speed in units per second, age in seconds within the ink's current generation (other particle types read 0), ink density at the particle, depth from the camera, height on the ink's local Z, distance from the ink's centre, or group (ink 0, silk 1, swirl 2, PRT input 3, ink in water 4, plus 0.5 for the second Assemble source). It takes over from the Colour projection; use 1 (speed) to pick out fast streaks, and note that age only varies with Seamless loop on, where the two generations differ by half a loop.
Channel value at the start of the ramp / Channel value at the end of the ramp -100,000 to 100,000 · default 0; 50Channel values mapped to the ramp ends; for height with Radius 50, use -50 and 50.
The channel values that map to the start and the end of the ramp; values beyond them keep the end colours. Match them to the channel: with the default Radius of 50, use -50 and 50 for height, 0 and 50 for radius, 0 and the Loop seconds value for age, and 0 and 4 for group/source.
Ramp start R (used when no colour map) / Ramp start G / Ramp start B / Ramp end R / Ramp end G / Ramp end B 0-1 · default start 0.05, 0.15, 0.45; end 0.55, 0.9, 1The two ramp colours over white; for more colours, use a Gradient Ramp in the map slot.
The two ramp colours as RGB values, each the colour the ink shows over white; they are replaced only when the Colour map slot holds a map and Colour is set to 1-7. For more than two colours, put a Gradient Ramp in the Colour map slot and set Colour to any value from 1 to 7.
Orb Ink - Scene objects and shadows
Brings meshes from the scene into the Ink render so the ink can light them, shadow them and focus light through the orb onto them.
Scene objects to render (lit, with the ink's shadow) / Scene objects: ambient light list of objects; 0-10 · default empty; 0.25Draws listed meshes as solid surfaces lit and shadowed by the ink; add a floor to see shadow.
Draws the listed visible meshes as solid, flat-shaded surfaces in their material's diffuse colour (or wire colour), lit by the ink's lights, shadowed by the ink and hiding the ink behind them, with the ambient value as an even fill on top. Add the floor under the orb to see the ink's shadow; the Studio's Orb FX + Ink together button adds Orb FX objects here, which then render their veil but not their glass.
Shadow catchers (invisible, only the ink's shadow) / Shadow strength on catchers list of objects; 0-10 · default empty; 1Hidden meshes that occlude ink and catch its shadow; use a floor for alpha compositing.
The listed meshes are not drawn, but they hide the ink behind them, and the background darkens where the ink's shadow falls on them and brightens under a caustic, scaled by Shadow strength on catchers. With Background set to 1 (transparent), a floor-plane catcher puts the shadow into the alpha for compositing over a Corona or V-Ray render.
Caustics: the orb focuses light onto scene objects / catchers / Caustic IOR (orb filled with: 1.33 water, 1.5 glass) on/off; 1-3 · default on; 1.33Traces lights through the orb for a focused spot and shadow; needs a surface and light.
Traces each light through the orb onto a horizontal plane at the top of the scene objects or catchers below it, giving the bright focused spot and the shaped shadow, with Caustic IOR as the refraction index of what fills the orb. It needs Glass sphere on, a surface under the orb within three glass radii and a light above it; use 1.5 for a solid glass ball.
Caustic strength / Ink dims the caustic (0 none, 1 full ink shadow) 0-20; 0-1 · default 1; 0.3Scales the caustic and how much ink dims it; keep strength at 1 for a physical result.
Caustic strength scales the effect, 0 removing it and values above 1 exaggerating both the bright spot and the orb's shadow, while Ink dims the caustic sets how far the ink inside the orb darkens the light passing through it. Keep the strength at 1 for a physical result; with caustics on, Ink dims also sets how dark the ink's own shadow is, so raise it toward 1 for a clear ink shadow.
Caustic softness (cells) / Light size for caustics (degrees; bigger = softer, wider) 0-10; 0-45 · default 1; 6Blurs and widens the caustic; raise softness if grainy, lower light size for a hard focus.
Caustic softness blurs the caustic over that many cells (one cell is 1/64 of the glass radius), and Light size spreads each light's rays up to that many degrees off its direction, widening and softening the focus like a larger lamp. Raise the softness if the caustic looks grainy (values above 6 add little); lower the light size toward 0 for a hard, sun-like focus.
Orb Ink - Ink in Water (fluid simulation)
Simulates the water inside the orb on the GPU and lets poured ink ride it, so the rolling billows come from a real fluid rather than noise.
Ink in water on (simulated water carries the ink) on/off · default offSimulates the orb's water over the frame range and releases ink at the source for it to carry.
Simulates the water in the orb once for the Start-End range and releases ink at the source to be carried by it. Water settings, Seed and Radius re-simulate the water, which takes a moment; counts, density and colour do not, except while a cloth wall is active, when any change to this object does.
Render particles / Viewport particles render 0-2,000,000,000; viewport 0-5,000,000 · default 20,000,000; 300,000Ink particles riding the water; use 20-40 million for finals for a smoother cloud.
The number of ink particles that ride the water in the render and in the viewport; only ink that has already been poured is shown. Use 20-40 million for finals; more particles give a smoother cloud at the same darkness.
Start frame / End frame (water simulated up to here) / Pour time (seconds) frames -100,000 to 100,000; pour time 0-1,000 · default Start 0; End 150; Pour time 2.5Sets simulated frames and pour length; a short pour gives one puff, a long one a stream.
The water is simulated from Start to End frame and the ink pours for Pour time seconds after Start; before Start there is no ink, and after End it stops moving. Set End to the shot's last frame, since every simulated frame holds GPU memory; a short Pour time gives one puff of ink, a long one a steady stream.
Source X (radii) / Source Y (radii) / Source Z (radii) / Source size (radii) X/Y/Z -1 to 1; size 0.01-0.5 · default 0, 0, 0.6; size 0.08Where the ink pours and how wide; Z 0.6 pours near the top, 0.3 from mid-height.
Where the ink is poured, measured from the Ink object's centre in multiples of its Radius, and the radius of the pour. Z 0.6 pours near the top, 0.3 from mid-height; a larger size (about 0.15) gives a wider, softer column.
Ink weight (sinks; negative rises) / Pour push weight -10 to 10; push 0-20 · default weight 4; push 3Ink weight sinks the inked water; Pour push drives it down, raise it for a deep jet.
Ink weight makes the inked water sink (negative values make it rise); Pour push drives the water at the source downward while the ink pours. Lower both to about 1 for a slow, lazy fall; raise Pour push for a jet that shoots deep before it billows.
Billows (vorticity) / Water stir billows 0-100; stir 0-5 · default billows 15; stir 0.3Billows adds rolling curls, Water stir adds slow swirls; about 7 with stir 2 gives soft rolls.
Billows strengthens the rolling, cauliflower-like curls the ink makes as it falls; Water stir sets the water turning slowly at the start, in large horizontal swirls that reverse direction with height. About 7 billows with a stir of 2 gives big soft rolls in swirling water; 0 billows gives a smooth fall, and a different Seed (Ink Particles) gives a different stir.
Water resolution 16-160 · default 96Water cells per direction for finer billows; use about 64 to set up and 96-128 for finals.
The number of water cells in each direction across the simulated volume; more cells give finer billows. Use about 64 while setting up and 96-128 for finals; if GPU memory runs out, lower it or shorten the frame range.
Ink density / Own colour for the ink in water / Ink colour R / Ink colour G / Ink colour B density 0-1,000; colour 0-1 · default density 3; Own colour on; colour 0.06, 0.28, 0.85How dark the ink renders and its own colour; turn Own colour off to shade it like the object.
How dark the poured ink renders and, with Own colour on, the colour it shows in place of the main Absorb/Scatter colours and the Particle shading colours. Turn Own colour off to shade this ink like the rest of the object; raise density to about 6 for a richer, more opaque cloud.
The cloth is a wall in the water (Particle Silk source) / Water moves the cloth (seconds of drift) drift 0-5 · default wall on; drift 0.15Makes water flow around the picked cloth while ink settles on it; set drift to 0 for still cloth.
With a Particle Silk cloth source picked, the water flows around that cloth (following its animation) and the ink settles on it; drift moves the rendered and exported silk particles by the local water speed times this many seconds. Set drift to 0 to keep the cloth still; the wall also works with both silk counts at 0, which makes any mesh an invisible obstacle, and turning the wall off stops the drift too.
Orb Ink - Particle Silk (cloth made of particles)
Turns the surface of an Orb FX veil or any UV-mapped mesh into a sheet of particles for the Ink renderer.
Cloth source (Orb FX object or any UV mesh)Picking an object fills its surface with silk particles that follow its animation; use 0-1 UVs.
Picking an object turns the silk on and fills its surface with particles that follow its animation; for an Orb FX object only its veil is used. Use clean 0-1 UVs, since particles are spread by UV area and the folds and frayed edges follow the UVs; this object is also the cloth wall for Ink in Water.
Silk render particles / Silk viewport particles render 0-2,000,000,000; viewport 0-5,000,000 · default 100,000,000; 300,000Particles on the cloth; more give a smoother sheet at the same darkness, 0 hides the silk.
The number of particles on the cloth in the render and in the viewport; 0 hides the silk there. Silk density is shared over the count, so more particles give a smoother sheet at the same darkness.
Silk thickness 0-100 · default 0.12How far particles spread either side of the cloth; keep about 0.05 for a crisp sheet.
How far, in scene units, the particles spread out on either side of the cloth surface. Keep it small (about 0.05) for a crisp sheet; larger values give a soft, gauzy layer.
Fine folds height / Fine folds per sheet / Fine folds detail height 0-100; per sheet 0.1-1,000; detail 1-6 · default height 0.6; per sheet 40; detail 3Small folds pushed off the surface that drift and return; set height to 0 for a smooth sheet.
Small folds pushed off the cloth surface and stretched along V: their height in scene units, how many fit across the 0-1 UV range, and how many layers of finer detail are added; they drift and return every Loop seconds (Flow). Set height to 0 for a smooth sheet; fewer folds per sheet give broader ripples.
Frayed edges 0-0.5 · default 0.03Width of the torn, wispy UV edge band; 0 gives clean hems, about 0.06 a soft veil edge.
The width, in UV units, of the band along the edges of the 0-1 UV square where particles scatter off the sheet and thin out, giving a torn, wispy edge. 0 gives clean hems; about 0.06 gives a soft veil edge.
Silk density 0-1,000 · default 0.45How dark and opaque the silk renders; about 0.2 gives a sheer veil, 1 or more a solid sheet.
How dark and opaque the silk renders, independent of the particle count. Lower it to about 0.2 for a sheer veil; raise it to 1 or more for a solid sheet.
Orb Ink - Surface Swirl (Vortex Force, no tyFlow)
Runs a Vanguard Orb Vortex Force on the GPU inside the Ink object, so its surface whirlpools render as millions of particles without tyFlow.
Vortex Force object (its settings and seed objects)Picking a Vanguard Orb Vortex Force turns the swirl on; tune the whirlpools on the force itself.
Picking a Vanguard Orb Vortex Force turns the swirl on: particles start on the force's sphere and are moved by its settings, seed objects and animation. Tune the whirlpools on the Vortex Force itself; this rollout only sets how they are simulated and rendered.
Swirl render particles / Swirl viewport particles render 0-2,000,000,000; viewport 0-5,000,000 · default 20,000,000; 200,000Swirl particles shown; more give a smoother result at the same darkness, 0 hides the swirl.
The number of swirl particles in the render and in the viewport; 0 hides the swirl there. More render particles give a smoother result at the same darkness, since Swirl density is shared over the count.
Force time unit (frames; 1 = tyFlow) / Swirl substeps time unit 0.0001-10,000; substeps 1-64 · default time unit 1; substeps 4Frames per force-time unit and steps per frame; raise substeps to 8-16 if particles overshoot.
Time unit sets how many frames make one unit of force time (higher runs the swirl slower); substeps is the number of integration steps per frame. Keep 1 to match tyFlow driven by the same force; raise substeps to 8-16 if particles overshoot or fly off in tight whirlpools.
Swirl start frame -100,000 to 100,000 · default 0Frame when particles leave the sphere; keep the viewport count low while animating.
The frame at which the particles leave the Vortex Force's sphere; before it they sit still on the sphere. Scrubbing backwards re-simulates from this frame, so keep the viewport count low while animating.
Swirl density 0-1,000 · default 2How dark and opaque the swirl renders; lower for faint smoky trails, raise for dense bands.
How dark and opaque the swirl particles render, independent of their count. Lower it for faint, smoky trails; raise it for dense, ink-like bands.
Orb Ink - Assemble (gather from objects)
Assemble flies the particles in from one or two scene objects and gathers them into the orb, driven by one animatable Progress value.
Assemble on / Source 1 (sphere, box, any object) / Source 2 (optional: half the particles) on/off; any object; any object · default off; none; noneStarts particles inside a source object and flies them into the orb; pick a source first.
Starts every particle inside a source object's bounding box (inside the sphere itself for a Sphere or GeoSphere) and flies it to its place in the orb; with two sources each particle picks one at random, so each source gets about half. Assemble does nothing until at least one source is picked; animate or move a source and the starting cloud follows it.
Progress (key it: 0 sources, 1 orb) 0-1 · default 1How far gathering has gone; key it from 0 to 1 over the shot, as at 1 nothing shows.
How far the gathering has gone: at 0 every particle sits in its source, at 1 the orb is fully formed and Assemble has no effect. Key it from 0 to 1 over the shot, for example frame 0 to frame 120; left at 1 the effect is invisible.
Departure spread 0-0.98 · default 0.6Staggers departures; near 0 gives one sudden pull, higher values a slow trickle.
Staggers the moment each particle leaves: at 0 all particles leave and land together, higher values spread the departures across the move so the orb fills in gradually and each particle flies faster. Lower it toward 0 for one sudden, unified pull; raise it toward 0.9 for a slow trickle.
Spiral turns on the way / Path bulge (orb radii) / Wander mid-flight (orb radii) -10 to 10; -2 to 4; 0-2 · default 1.5; 0.3; 0.15Shapes flight with spiral turns, outward bulge and random wander; 0 turns means no spiral.
Shape the flight: particles circle the Ink object's Z axis this many times, bow outward from the axis by the bulge at mid-flight, and drift randomly by the wander amount, which fades to nothing at both ends. Use 0 turns for paths with no spiral; negative turns reverse the spin and a negative bulge pulls the paths in toward the axis.
Smoke curls on the way (orb radii) / Smoke curl size (swirls per radius) 0-5; 0.1-20 · default 0.6; 2Moves particles through drifting smoke-like curls mid-flight; set curls to 0 for clean spirals.
Carries the travelling particles through a slowly drifting, smoke-like curl field, strongest mid-flight and gone on arrival; the size sets how many swirls fit in one orb radius. Set Smoke curls to 0 for clean spirals; raise Smoke curl size to about 6 for smaller, busier curls.
Orb Ink - PRT export channels (Krakatoa, Frost, tyFlow)
Chooses which channels the Export PRT sequence (all channels) button in Orb FX Studio writes; Position and Density are always written.
Velocity (units per second, for motion blur) / Velocity scale on/off; 0-100 · default on; 1Writes particle velocity for motion blur; export with a scale below 1 for shorter streaks.
Writes each particle's speed and direction in scene units per second, measured from the previous frame and multiplied by Velocity scale; particles the flow loop restarts on that frame get zero velocity. Keep it on for motion blur in Krakatoa or Frost; export with a scale below 1 (for example 0.5) to shorten the blur streaks.
Color (colour map / material / ink colour) / Emission (self-illumination) / Color / Emission multiplier on/off; on/off; 0-100 · default on; on; 1Writes ink colour and emission; turn Emission off when the ink does not glow to save space.
Color writes each particle's ink colour (from the Absorb values, a Particle material or a Vanguard Ink Material) blended with the colour map, Emission writes the self-illumination colour, and both are multiplied by the multiplier; Colour by ramps are not included. Emission is the same value for every particle, so switch it off when the ink does not glow to save 6 bytes per particle.
Normal (from the density: veil surface direction) / Normal grid resolution on/off; 32-512 · default on; 128Writes normals from a density grid; raise resolution if close-ups look blocky, at a memory cost.
Writes a normal per particle that points away from the densest part of the veil, taken from a density grid with this many cells across the orb (or across the wider area that Assemble or PRT input particles reach). Raise the resolution to 256 when close-up shading looks blocky; memory grows with the cube of the value (512 needs about 0.5 GB), and switching Normal off skips the grid.
ID (stable per particle) / Age (seconds since the particle was born) / Source + Group (assemble source 0/1/2, group ink/silk/swirl) / Rest (birth position / cloth UV, for re-texturing) on/off · default onWrites ID, Age, Source, Group and Rest channels; switch off unused ones for smaller files.
Bookkeeping channels: ID numbers each particle in export order (stable while particle counts stay the same), Age is seconds since the flow last restarted an ink tracer (since the swirl start for swirl, scene time for the others), Source is its Assemble source (0 = none), Group its kind (0 ink, 1 silk, 2 swirl, 3 PRT input, 4 ink in water), and Rest the birth position of an ink tracer, the cloth UV of a silk particle, or the current position for the other groups. Use Group and Source in Krakatoa Magma or tyFlow to treat ink and silk separately; switch off the channels you do not need to keep files smaller.
World space (off = object space, load with the object's transform) on/off · default offWrites data in world space; turn on when the PRT goes to a scene that lacks the Ink object.
On writes positions, velocities and normals in world coordinates; off writes them relative to the Ink object, so the loader must carry the Ink object's transform. Turn it on when the PRT goes to another scene or tool that does not know where the Ink object sits.
Orb Ink - PRT input (render any PRT sequence)
Brings an existing PRT sequence into the Ink object so the Orb Ink renderer shades it with the same lights and self-shadows as the ink.
Render the PRT sequence below / PRT file (any frame of the sequence) / Frame offset on/off; a .prt file; -100,000 to 100,000 · default on; none; 0Loads a PRT sequence to render with the orb; use Frame offset to line up files with the shot.
Loads a PRT sequence from Krakatoa, tyFlow, Frost, Houdini or Orb Ink and renders it together with the object's own particles; the last number in the file name (or ####) is replaced by the current frame plus Frame offset. A frame with no file on disk stops the Ink render for that frame, so use Frame offset to line the files up, for example 100 when the files start at frame 100 and the shot starts at 0.
Density 0-1,000 · default 1Overall darkness of the loaded cloud; raise it when a sparse file renders too faint.
Darkness of the loaded cloud as a whole, shared among however many particles are loaded; the file's own Density channel, if present, still weights each particle. Raise it when a sparse file renders too faint; because it is shared out, loading fewer particles changes the grain, not the darkness.
Use the file's Color / Emission on/off · default onUses the file's Color and Emission channels; turn off to apply Orb Ink's own colour controls.
Uses the Color and Emission channels stored in the file: Color replaces the ink colour, colour map and Colour by for those particles, and Emission is added to the Ink object's own self-illumination; off shades them like the rest of the ink. Turn it off to apply Orb Ink's own colour controls; it makes no difference when the file has no Color or Emission channel.
File is in world space (Krakatoa, tyFlow) on/off · default onReads positions in world space; turn off for PRTs exported from Orb Ink with World space off.
On reads positions as world coordinates, so the particles stay where they were in the source scene wherever the Ink object sits; off reads them relative to the Ink object, so they move with it. Turn it off for PRTs exported from Orb Ink with World space off.
Viewport particles / Render particles (0 = all in the file) 0-50,000,000; 0-2,000,000,000 · default 300,000; 0Caps loaded particles by keeping every Nth; use a few million for quick test renders.
Caps how many particles are loaded for the viewport and for rendering by keeping every Nth particle of the file; 0 loads all of them. Set Render particles to a few million for quick test renders; the darkness stays the same and only the grain changes.
Orb Ink - About / Help
Shows a short quick-start note and the viewport mark switch; the full guide opens from the About / Help button in Orb FX Studio.
Show the VanguardFX mark in the viewport on/off · default onShows the logo beside the Ink object in viewports only; turn it off to unclutter the view.
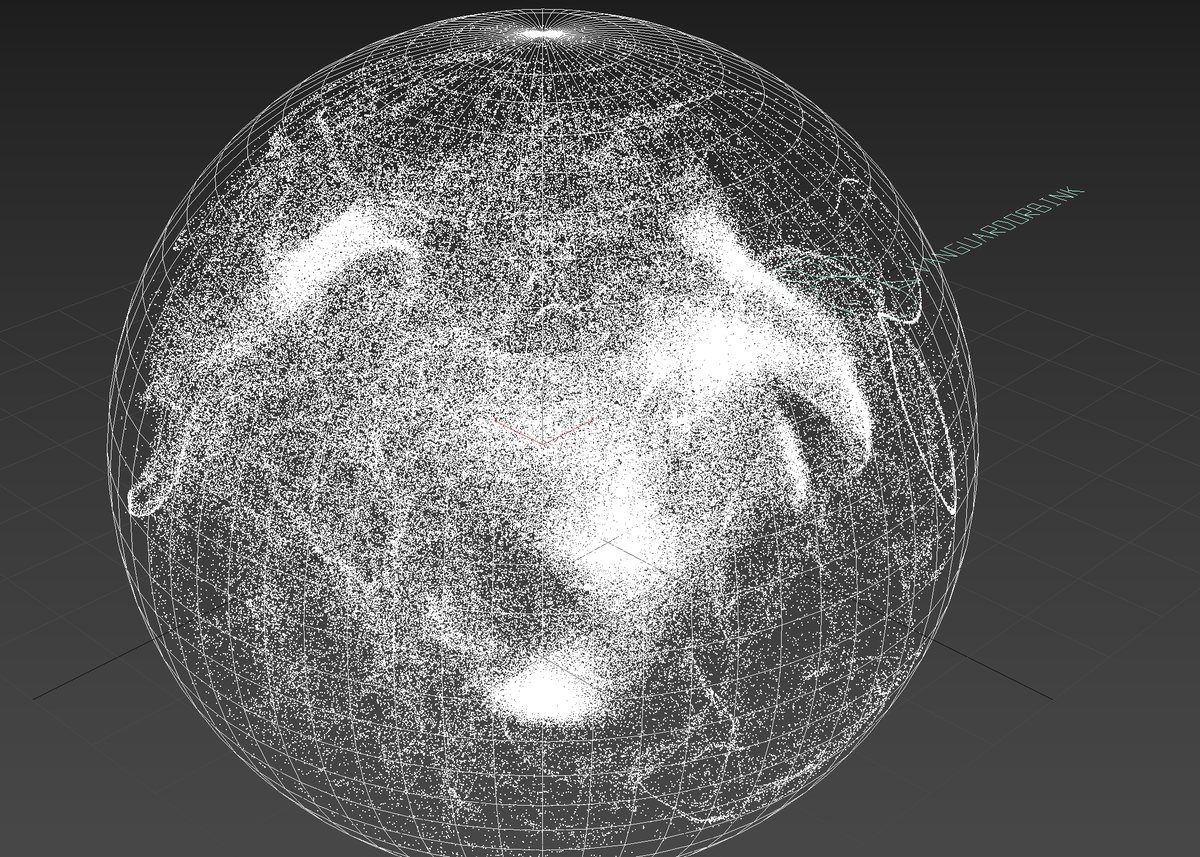
Draws the VanguardFX sheep mark and the word VANGUARDORBINK beside the Ink object in the viewports; it never appears in renders. Turn it off to unclutter a busy viewport.
Orb FX object - Shape
Sets the size of the orb, the glass and haze spheres, and the shape and placement of the silk veil; the veil controls and Shell clearance re-simulate the loop, while Radius, Glass wall thickness and Haze volume fill do not.
Radius 0.01-100,000 · default 50Sets the orb's size; resize freely, as motion stays the same and nothing re-simulates.
Size of the orb in scene units; the glass, haze and veil all scale with it. Resize freely: the cloth is solved at a fixed reference size, so the motion stays the same and nothing re-simulates.
Glass wall thickness (ratio of radius, 0 = thin) 0-0.3 · default 0Adds an inner glass surface for a solid wall; keep Haze volume fill below 1 minus this.
Adds a second, inward-facing glass surface this far inside the shell (as a fraction of the radius), so a renderer refracts light into and out of a solid wall; 0 builds a single thin surface. Set it before Apply preset to selected in Orb FX Studio, which gives the glass a solid rather than thin-walled material when this is above 0; keep Haze volume fill below 1 minus this value.
Haze volume fill 0.2-0.995 · default 0.96Sets the inner haze sphere's size; lower it to leave clear glass between haze and shell.
Radius of the inner haze sphere (material ID 2) as a fraction of the orb radius. Lower it to leave a band of clear glass between the haze and the shell.
Shell clearance 0.02-0.4 · default 0.05Keeps the veil off the glass; raise it if the veil looks pressed against the glass.
Smallest gap the veil keeps from the outer glass surface, as a fraction of the radius; the cloth is never allowed closer. Raise it if the veil looks pressed against the glass; with a thick wall, keep it above Glass wall thickness so the veil stays inside the inner surface.
Veil count / Veil source meshes (row n = veil n, UV 0..1 sheets) 1-4 · default 1 / emptySets how many silk sheets there are; a UV-mapped mesh in the list can replace a veil's band.
Number of silk sheets, each placed and turned a little differently; a UV-mapped mesh in row n of the list replaces veil n's built-in band (and the band controls below) as its starting shape, and adding more meshes than veils raises the count up to 4. Shape a Plane with modifiers (UVs 0-1, U along the veil) to direct the drape; its V = 1 edge is the one Anchor 1 pins, and editing the mesh re-simulates the loop.
Veil rest radius / Veil arc span (deg) / Veil width 0.3-0.95 / 30-340 / 0.05-1 · default 0.9 / 250 / 0.62Sets the band's starting size; short and narrow gives a ribbon, wide and long a curtain.
The band's starting size: its distance from the centre (fraction of radius), how many degrees it wraps around the orb, and how wide it is across, narrowing toward both ends. A short span and narrow width give a ribbon; a span near 340 with a width near 1 gives a wrap-around curtain.
Veil latitude / Veil tilt X / Veil tilt Y / Veil tilt Z -1 to 1 / -180 to 180 each · default 0.42 / -20, 10, -90Places and tilts the band; angle the veil here, since gravity follows the object's Z axis.
Latitude slides the band from the equator (0) toward either pole (1 or -1); the three tilts then rotate the whole band, in degrees. Angle the veil here rather than rotating the object, because gravity acts along the object's own Z axis.
Pleat depth / Pleat count 0-0.3 / 0.5-10 · default 0.2 / 3Adds large soft folds to the starting shape; set depth to 0 to start from a smooth band.
Large, soft folds built into the starting shape: depth sets how far they bulge in and out, count roughly how many run along the band. Set depth to 0 to start from a smooth band and let Cloth slack and the wind make the folds.
Orb FX object - Fabric Surface
Builds the rendered two-sided sheet around the simulated cloth; only Seed re-runs the solver.
Sheet thickness / Thickness in folds / Edge softness 0.0005-0.08 / 0-6 / 0.02-1 · default 0.01 / 1.5 / 0.45Sets veil thickness and edge fade; raise Edge softness for a feathered, gauzy border.
Distance between the veil's front and back skins (fraction of radius), extra thickness where the cloth bunches up, and how far in from the border the sheet thins out and its vertex-colour density, which the Studio's Corona veil material uses as opacity, fades to zero. Raise Edge softness for a feathered, gauzy border; lower it for a crisp hem.
Wrinkle amount / Wrinkle scale 0-3 / 0.5-40 · default 0.6 / 10Adds fine moving wrinkles; set amount to 0 for smooth satin, and use enough render segments.
Fine fabric wrinkles that move with the loop and are strongest where the cloth is compressed: amount sets their height, scale how many fit on the sheet (higher is finer). Set amount to 0 for smooth satin; fine wrinkles need enough Render segments to show.
Seed 0-100,000 · default 42Changes the random pattern and re-simulates; try a few seeds for a different drape.
Changes the random pattern behind the pleats, wind, wave timing and wrinkles, and re-simulates the loop. Try a few seeds to get a different drape without changing anything else.
Orb FX object - Loop / Motion
Sets the length of the seamless loop and how strongly the veil moves, which re-simulate, and how the cached loop plays back, which does not.
Loop seconds 0.5-60 · default 9Sets one seamless cycle's length; use the shot length or a whole fraction of it.
Length of one seamless cycle in seconds: the wind and wave repeat once per cycle, and two simulated cycles are cross-faded so the motion loops without a jump. Use the shot length or a whole fraction of it (a 9 s loop in an 18 s shot); longer loops take longer to simulate and move more slowly.
Motion amount 0-2 · default 0.8Scales the wind and wave forces; at 0 the veil simply hangs, above 1 it billows.
Scales the wind and travelling-wave forces that drive the loop; at 0 the veil simply hangs. Lower it for a slow drift; raise it above 1 for agitated, billowing cloth.
Speed / Reverse / Phase (cycles) / Freeze at phase 0.01-10 / on/off / -100 to 100 / on/off · default 1 / off / 0 / offControls cached loop playback; give copied orbs different phases so they move out of step.
Play back the cached loop: Speed scales the rate (at 2, a 9-second loop repeats every 4.5 seconds), Reverse runs it backward, Phase shifts it by cycles (0.5 = halfway), and Freeze at phase holds the veil still at that point. None of these re-simulate; give copied orbs different phases so they do not move in step.
Orb FX object - Fabric Physics
The cloth solver: how the fabric behaves and which forces move it. Every control here re-simulates the loop.
Stiffness / Bend stiffness / Damping / Solver substeps 1-40 / 0.1-8 / 0.1-12 / 1-8 · default 16 / 0.3 / 3.5 / 4Sets cloth stiffness and damping; raise Solver substeps to 6-8 if the cloth jitters.
How strongly the cloth resists stretching and sharp bending, how quickly motion between neighbouring points calms down, and how many solver steps run per simulated frame. Low Bend stiffness gives soft silk with small folds; raise Solver substeps to 6-8 if stiff or windy settings make the cloth jitter.
Cloth slack (folds) / Rest shape hold 0.8-2 / 0-2 · default 1.2 / 0.05Slack above 1 makes the cloth fold; raise Rest shape hold to keep the band under wind.
Slack multiplies the cloth's rest lengths, so above 1 there is more fabric than room and it folds; Rest shape hold pulls every point back toward the starting band, as a fraction of Stiffness. Raise Rest shape hold to keep the designed band under strong wind; set slack below 1 to pull the sheet taut.
Anchor (0 ends,1 top,2 both) 0-2 · default 1Chooses which edges are pinned; use 0 for a ribbon held at its ends.
Which edges are pinned in place: 0 holds both ends of the band, 1 holds the top edge like a curtain rail, 2 holds both. Use 0 for a ribbon held at its ends that swings freely in the middle.
Gravity / Wind -40 to 80 / 0-40 · default 8 / 16Sets gravity along the object's -Z and a looping wind; gravity near 0 feels underwater.
Gravity pulls the cloth along the object's negative Z axis (negative values make it rise); Wind is a looping push whose direction changes along the veil and over the cycle, also scaled by Motion amount. Set Gravity near 0 for a weightless, underwater feel.
Wave amplitude / Wave cycles / Wave speed / Wave spread 0-30 / 0.25-12 / -8 to 8 / 0.05-2 · default 14 / 2 / 1 / 0.7Adds a wave travelling along the veil; keep Wave speed a whole number so it loops cleanly.
A wave that travels along the veil pushing it in and out: amplitude is its strength (also scaled by Motion amount), cycles the number of crests along the veil, speed how many wavelengths pass per loop and in which direction, spread how much of the veil's width it reaches. Keep Wave speed a whole number (1, 2, -1) so the wave lines up exactly with the loop.
Self collision / Self collision distance on/off / 0.1-8 · default on / 2.5Stops the sheet folding onto itself nearby; raise it if tight folds collapse into creases.
Stops the sheet folding back onto itself over short distances by keeping every point at least this far from the points three grid cells away on the same veil, measured as if the orb radius were 50. Raise the distance if tight folds collapse into hard creases; it does not keep distant parts of the sheet or separate veils apart.
Orb FX object - Quality / Components
Simulation and mesh resolution, where the solver runs, and which parts of the orb are built.
Cloth cells along / Cloth cells across 16-256 / 8-128 · default 96 / 32Sets each veil's simulation grid; settle it before tuning Fabric Physics.
Resolution of each veil's simulated grid along its length and across its width; changing it re-simulates the loop. Raise both for finer folds at the cost of solve time; settle them before tuning Fabric Physics, because the same settings behave differently at another resolution.
Viewport segments / Render segments 12-256 / 12-256 · default 48 / 128Sets mesh detail; keep viewport low for scrubbing, raise render for close-ups.
Mesh detail of the glass and haze spheres and of the smoothed veil surface, in the viewports and at render time. Keep Viewport segments low for responsive scrubbing; raise Render segments for close-ups and fine wrinkles.
Use CUDA (CPU fallback) on/off · default onRuns the cloth solver on the NVIDIA GPU, falling back to CPU; applies at next re-simulation.
Runs the cloth solver on the NVIDIA GPU and falls back to the CPU solver when there is no CUDA device, not enough GPU memory, or a CUDA error. Switching it takes effect at the next re-simulation; $.solverStatus() in the MAXScript Listener shows which solver ran and how long it took.
Glass shell / Haze volume / Silk veil on/off · default on (all three)Builds or skips each mesh part; turn off glass and haze to render the veil alone.
Build or skip each part of the mesh; they carry material IDs 1 (glass), 2 (haze), 3 (veil front and rim) and 4 (veil back). Turn off the glass and haze to render the veil alone, for example inside your own glass model.
Vanguard Ink Material - Ink shading
Vanguard Ink Material (Material/Map Browser > VanguardFX Tools) holds the Ink particle shading. Put it in an Ink object's Particle material slot and its settings replace the object's own ink shading; lights, HDRI and glass stay on the object.
Absorb (what the ink removes) / Scatter (colour of lit ink) / Scatter amount Scatter amount 0-10 · default Absorb (1.0, 0.68, 0.4); Scatter (0.35, 0.55, 0.95); Scatter amount 0.12Absorb tints light passing through; Scatter is lit colour. Keep Scatter low for dye on glass.
Absorb sets how strongly the ink removes red, green and blue from light passing through it, so the ink shows the opposite colour. Scatter is the colour the lit ink gives back, scaled by Scatter amount. Keep Scatter amount low for a dye-on-glass look. Raise it when ink in front of a dark background needs to show colour.
Density multiplier / Opacity Density multiplier 0-100; Opacity 0-1 · default Density multiplier 1.0; Opacity 1.0Scale each particle's colour and absorption. Lower Density, not particle count, if ink clogs.
The two are multiplied together and scale how much colour and absorption each particle adds to the image, replacing the Ink object's Particle opacity / brightness; the self-shadow is not changed. On ordinary geometry in another renderer, Density multiplier is ignored and Opacity becomes transparency. When ink clogs into flat dark areas, lower Density multiplier instead of the particle count.
Emission colour / Emission amount / Emission map (optional) Emission amount 0-100 · default Emission colour (0.2, 0.5, 1.0); Emission amount 0; map noneMakes ink glow without light, brightest where dense. Use it for ink on a black background.
Makes the ink glow without light: brightest where it is dense, and dimmed by ink in front of it. The map does not vary across the particles: it is averaged to one colour that tints Emission colour. Use it for ink that has to read on a black background. The glow is also written to the EXR emission pass.
Vanguard Ink Material - Colour (map, gradient, channel)
Colours each particle from a map projected onto the particles, or from a measured channel such as speed or age.
Colour map (gradient, bitmap, any map) / Map strength Map strength 0-1 · default map none; Map strength 1.0Colours particles from any map, read as ink on white. Lower Map strength to keep base colour.
Takes the particle colour from any 3ds Max map, read as how the ink looks on white. Map strength blends it over Absorb and Scatter. Lower Map strength to keep some of the base ink colour under the map.
Projection: 1 Z 2 radial 3 sphere 4 top 5 front 6 X 7 Y / Map scale / Colour sticks to the particles Projection 0-7; Map scale 0.01-100; Colour sticks on/off · default Projection 3 (sphere); Map scale 1.0; Colour sticks onLays the colour map onto particles. Turn Colour sticks off to flow through fixed colour.
With a Colour map set, Projection lays it onto the particles relative to the orb radius: a gradient along Z, X or Y, radial from the centre, spherical, or planar from the top or front (0 acts as 1). Map scale repeats the map across its width (U), and Colour sticks takes each particle's colour from where it was born (silk uses its UVs), so the colour moves with the ink. Turn Colour sticks off to make particles flow through a fixed field of colour.
Colour by: 0 map 1 speed 2 age 3 density 4 depth 5 height 6 radius 7 group / Channel value at ramp start / Channel value at ramp end / Ramp start (no map) / Ramp end (no map) Colour by 0-7; channel values -100,000 to 100,000 · default Colour by 0 (map); start 0; end 50; Ramp start (0.05, 0.15, 0.45); Ramp end (0.55, 0.9, 1.0)Colours particles by a measured channel. Set end value near the shot's highest value.
Colours particles by a measured channel instead of by position: the channel value between the start and end values picks a colour along the Colour map, or between the two ramp colours when no map is set. Map strength sets how much of that colour is used, and 0 counts as full. For speed (units per second) or age (seconds), set the end value near the highest value in the shot so the ramp does not saturate.
Vanguard Ink Material - Falloff (fabric look)
Makes veils denser, and optionally tints them, where they turn edge-on to the camera, like folds in fabric.
Falloff on / Density facing the camera / Density edge-on / Curve (higher = only the edges) Falloff on on/off; facing 0-10; edge-on 0-20; Curve 0.05-10 · default Falloff off; facing 0.15; edge-on 3.0; Curve 3.0Thin veils read light face-on, dense edge-on. Turn it on for silk and folded veils.
Scales ink density by how a veil faces the camera: thin sheets read light face-on and dense edge-on. Curve limits the dense part to the sharpest edges. Turn it on for silk and folded veils to get the look of fabric.
Edge colour / Edge colour amount Edge colour amount 0-1 · default Edge colour (0.55, 0.85, 1.0); amount 0Tints edge-on veil parts with a second colour; needs Falloff on. Pick a lighter colour.
Tints the edge-on parts of veils with a second colour, following the same Curve. It works only with Falloff on. For a sheen along folds, pick a colour lighter than the ink.
Vanguard Ink Material - Particles and light
Sets how each particle is drawn into the image and how the ink is lit.
Particle size (pixels) / Particle softness / Size variation size 0-64; softness 0-1; variation 0-1 · default size 1.0; softness 0.5; variation 0Sets each particle's pixel footprint and edge. Use 2-3 to smooth grain, 1 for finest detail.
Particle size is each particle's footprint in output pixels; a larger size spreads the same ink, it does not add ink. Softness sets the edge, from a hard disc (0) to a soft Gaussian (1), and Size variation randomises size per particle. Up to 1.5 pixels a particle is shared between the four nearest pixels, so Softness only matters above that. Raise size to 2-3 to smooth a grainy render with fewer particles; keep 1 for the finest detail.
Self-shadow strength / Ambient light Self-shadow strength 0-10; Ambient light 0-10 · default Self-shadow strength 1.2; Ambient light 0.12Sets ink self-shading and flat fill light. If the far side goes black, raise Ambient light.
Self-shadow strength sets how much the ink shades itself, and the surfaces under it, from each light; it is scaled by the average of Absorb. Ambient light is a flat, unshadowed light on the scattered colour of the ink, with the HDRI's average colour added when an HDRI is loaded and HDRI light on the ink is above 0. If the far side of dense ink goes black, lower Self-shadow strength or raise Ambient light.
Vanguard Orb Vortex Force
A space warp (Create > Space Warps > VanguardFX) that holds particles on a sphere and spins them into whirlpools around moving vortex centres. Use it from a tyFlow or Particle Flow Force operator, or pick it as the Vortex Force object in an Ink object's Surface Swirl rollout.
Sphere radius / Surface hold Sphere radius 0.01-100,000; Surface hold 0-1,000 · default Sphere radius 50; Surface hold 4Sphere particles are held on and the spring pulling them back. Match radius to the cloud.
Sphere radius is the radius, measured from the force object's centre, of the sphere particles are held on. Surface hold is the strength of the spring that pulls them back onto it. Match Sphere radius to the particle cloud (dragging out the icon when you create it sets the radius). Lower Surface hold to let particles lift off the surface.
Vortex count / Seed Vortex count 1-64; Seed 0-1,000,000 · default Vortex count 10; Seed 42Procedural vortices spread over the sphere. Change Seed to try another arrangement.
Vortex count is the number of procedural vortices spread evenly over the sphere, added to any seed objects (64 at most in total). Seed sets their random tilt and wander paths. Change Seed to try another arrangement with the same settings.
Seed objects (each = one vortex; User Properties: swirl= attract= spread= eye= on=) / Add object / Remove default emptyEach listed object adds a vortex in its direction. Animate Point helpers to steer vortices.
Each listed object adds a vortex in its direction from the force centre. User Properties on that object override the global values for its vortex: swirl= and attract= are multipliers, spread= (degrees) and eye= replace the global value (0 keeps it), and on=0 switches the vortex off (not at Partition sharpness 0). Place Point helpers to put vortices exactly where you want them and animate the helpers to steer the vortices. swirl=-1 makes a vortex turn the other way.
Swirl strength / Attraction to vortex -1,000 to 1,000 (both) · default Swirl strength 24; Attraction to vortex 0.5Spin around and pull toward each vortex. A small negative attraction opens a clear eye.
Swirl strength sets how strongly particles are spun around each vortex centre (positive turns counter-clockwise seen from outside the sphere), and Attraction to vortex how strongly they are drawn toward it along the surface. Negative values reverse the spin or push particles outward. A small negative Attraction to vortex opens a clear eye in each whirlpool.
Vortex spread (deg) / Vortex eye (rigid core) / Partition sharpness spread 1-180; eye 0.01-1; sharpness 0-16 · default spread 30; eye 0.25; sharpness 2Vortex size, solid eye and border strictness. Raise sharpness for clean whirlpool borders.
Vortex spread is the angular size of each vortex. Vortex eye is the share of that size that turns like a solid disc, with the swirl rising from zero at the centre. Partition sharpness sets how strictly each particle follows its nearest vortex rather than a blend of all of them. Raise Partition sharpness for clean borders between whirlpools; lower Vortex eye for a tight, fast centre.
Seed wander / Loop seconds / Turbulence Seed wander 0-2; Loop seconds 0.1-3,600; Turbulence 0-1,000 · default Seed wander 0.5; Loop seconds 9; Turbulence 8Vortex drift, loop time and turbulence. Set Loop seconds to the animation length.
Seed wander is how far each procedural vortex drifts around its home position on a closed path. Loop seconds is the time after which that drift and the turbulence repeat exactly, and Turbulence adds noise along the surface that keeps particles between vortices moving. Set Loop seconds to the animation length (300 frames at 30 fps = 10) so the vortex paths are back at their start when the animation ends.
Drag / Response scale Drag 0-10; Response scale 0.0001-100 · default Drag 0.15; Response scale 0.01Drag slows particles; Response scales all forces. In tyFlow keep Response near 0.01.
Drag slows particles in proportion to their speed. Response scale multiplies all the other forces before they reach the particles. In tyFlow keep Response scale near 0.01: much higher values throw particles off the sphere.
Icon size 0.01-100,000 · default 50Size of the viewport icon and vortex markers. Set it equal to Sphere radius.
Size of the viewport icon. The small markers that show each vortex moving are drawn on a sphere of this size. Set it equal to Sphere radius to see the markers on the particle surface.
Vanguard Orb Particle Force
The original Orb FX space warp (Create > Space Warps > VanguardFX), kept so older scenes still load. It pushes particles toward a shell, pulls them to a centre or moves them through curl noise, and adds swirl around its local Z axis.
Mode (0 shell, 1 vortex, 2 attract, 3 curl) / Strength Mode 0-3; Strength -10,000 to 10,000 · default Mode 0 (shell); Strength 12Picks shell, vortex, attract or curl flow. In attract, negative Strength pushes outward.
Shell pushes particles inside Radius outward toward it, capped by Shell band. Vortex is the same push without the cap, attract pulls particles toward the centre, and curl replaces all of these, including Swirl and Axial flow, with a swirling noise flow of strength Strength + Swirl. In attract mode, a negative Strength pushes particles away from the centre.
Radius / range / Falloff exponent / Shell band Radius 0.01-100,000; Falloff exponent 0.1-10; Shell band 0.01-100,000 · default Radius 50; Falloff exponent 2; Shell band 8Force fades from centre to nothing at Radius. Raise the exponent to keep it near the centre.
The force is full at the centre and fades by Falloff exponent to nothing at Radius, with no effect beyond it. Shell band caps the shell-mode push at Shell band x Strength. Raise Falloff exponent to keep the force near the centre; 1 gives a straight linear fade.
Swirl / Axial flow -10,000 to 10,000 (both) · default Swirl 18; Axial flow 0Spins particles around and pushes along the icon's Z. Rotate the object to tilt the axis.
In modes 0-2, Swirl spins particles around the icon's local Z axis and Axial flow pushes them along that axis. In curl mode, Swirl adds to the noise strength and Axial flow is not used. Positive Swirl turns counter-clockwise seen from the icon's +Z; rotate the force object to tilt the axis.
Turbulence / Turbulence scale / Time scale / Seed Turbulence 0-10,000; Turbulence scale 0.0001-100; Time scale -100 to 100; Seed 0-1,000,000 · default Turbulence 4; Turbulence scale 0.08; Time scale 1; Seed 42Adds wavy noise with size, speed and seed. Set Time scale to 0 to freeze the noise.
Turbulence adds a wavy noise of this strength. Turbulence scale sets the noise size (higher values give smaller eddies, and curl mode uses it too), Time scale sets how fast the noise changes, and Seed offsets the noise so the same settings give another pattern. Set Time scale to 0 to freeze the noise, or negative to run it backwards.
Particle drag / Force response scale Particle drag 0-100; Force response scale 0.0001-10 · default Particle drag 0.05; Force response scale 0.01Drag slows particles everywhere; response scales forces. Keep response near 0.01.
Particle drag slows particles in proportion to their speed everywhere, outside Radius too. Force response scale multiplies all the other forces before they reach the particles. Keep Force response scale near 0.01. If the force is too weak, raise it gradually.
Icon size 0.01-100,000 · default 50Size of the octahedron viewport icon; it does not change the force.
Size of the octahedron icon in the viewport. It does not change the force.